Setting up an AdafruitIO Dashboard
Note: This portion of the guide is useful if you are not going to be using the iOS app Garage
To create an AdafruitIO Dashboard to view your feeds, you must have already created an AdafruitIO account and setup your feeds. The guide for doing those steps can be found here.
To create a Dashboard, first login in at io.adafruit.com. You should see a web page that looks something like this:
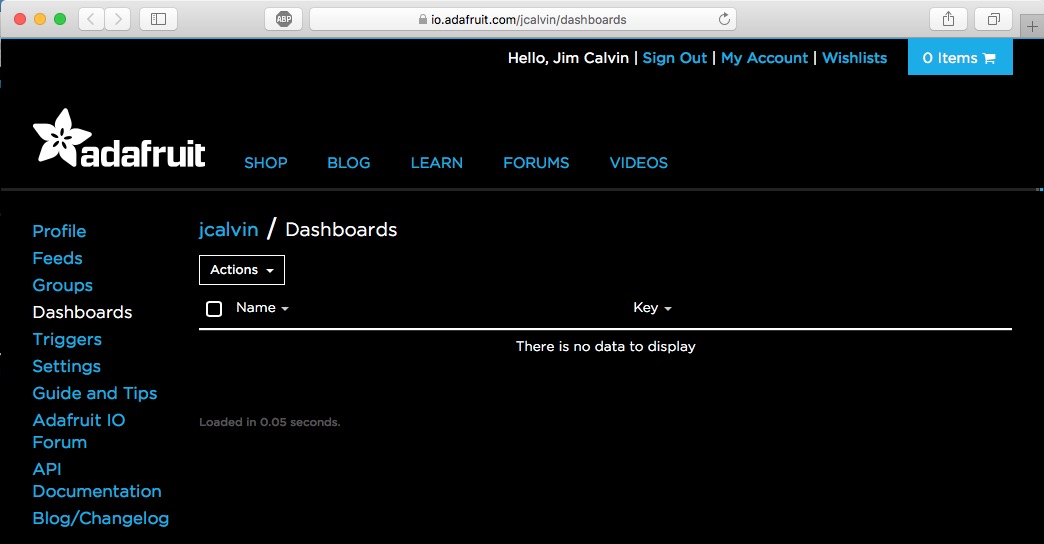
AdafruitIO login page
Click on the "Actions" drop-down menu and choose "Create A New Dashboard".
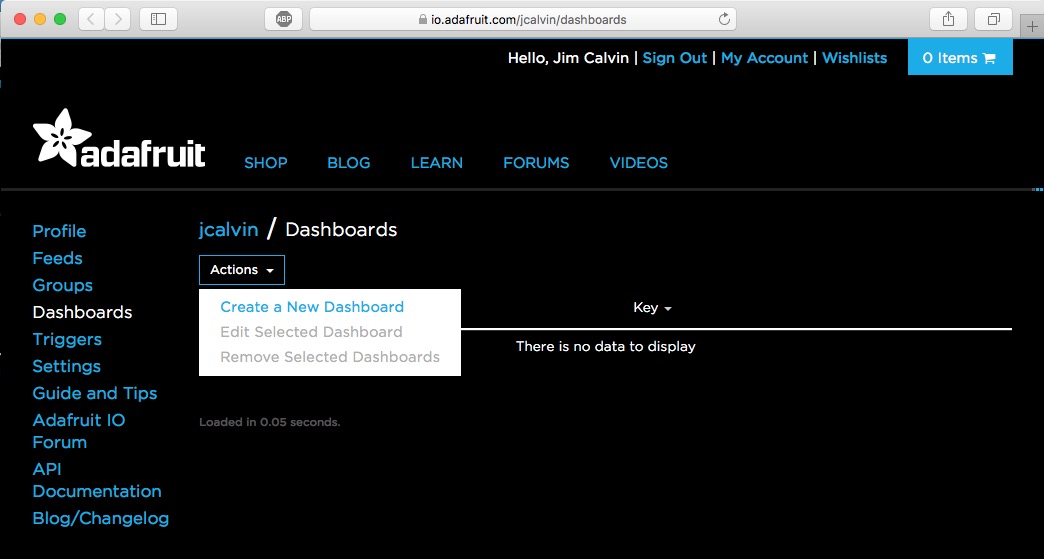
First step in Dashboard creation
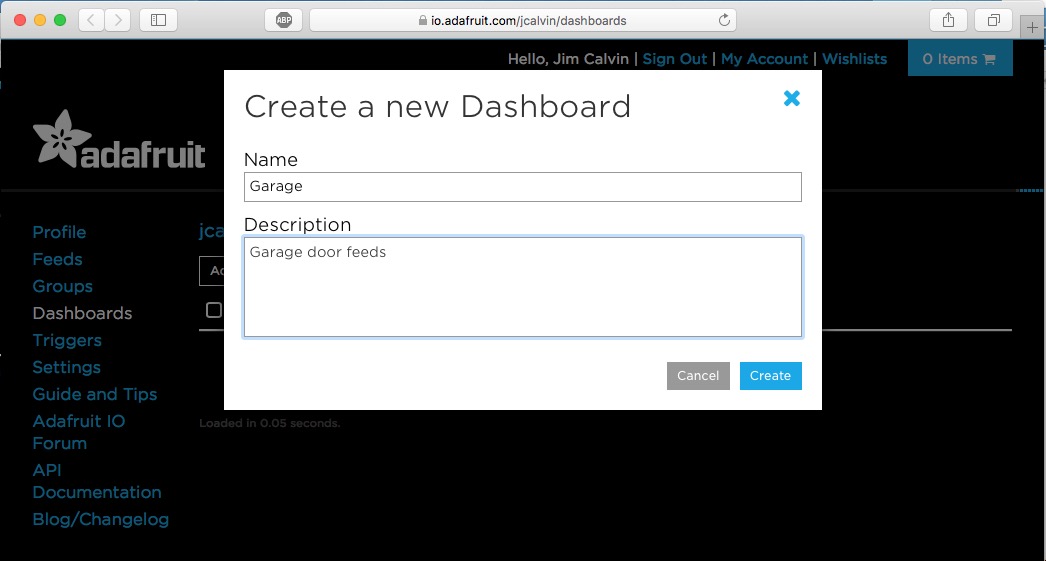
Second step in Dashboard creation
Give the Dashboard a name and description. The names you chose here are not important to any software in the project. Click "Create" when done. Now the page should like similar to the image below.
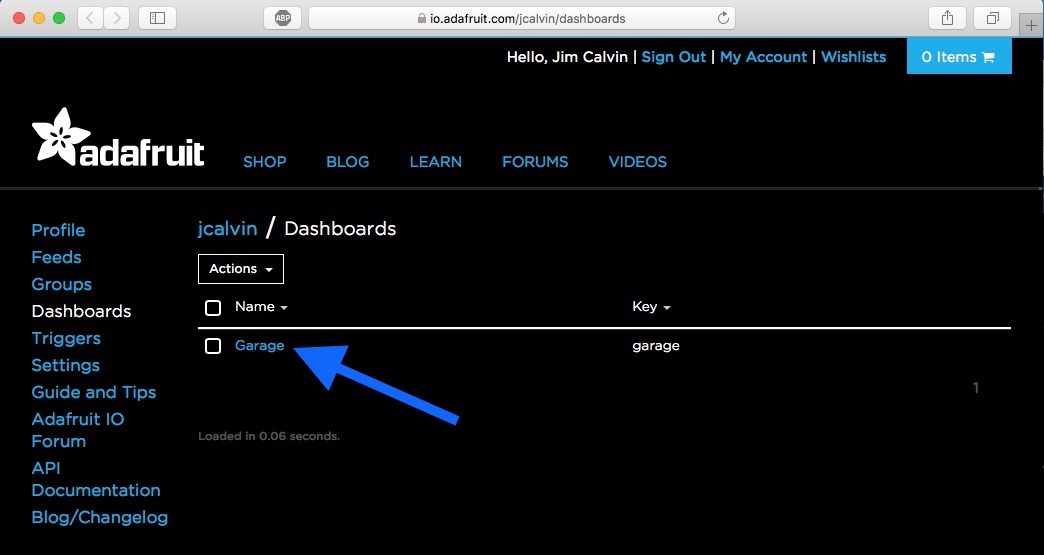
Dashboard created
Now click on the name of your Dashboard. This will open the Dashboard. It will be empty, but we'll use the "+" button to add "Blocks" to the Dashboard. Each Block will display the state of one of our Feeds.

Preparing to add a Block
Clicking on the "+" starts the multi-step process of creating a Block. The process starts with choosing a Block type. Start by clicking on the "Text" type. This will display the state of our magnetic contact switches.
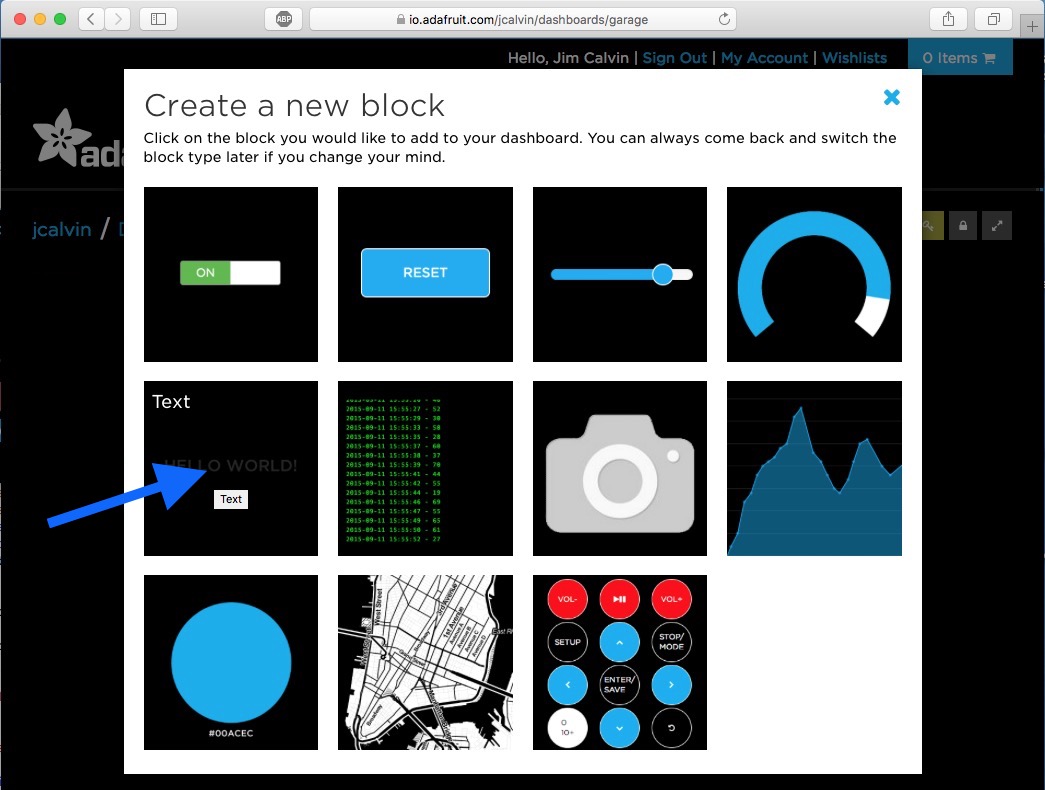
Choosing a Block type
Next we associate a Feed with this Block. Select "left-reed" and click "Next step>".
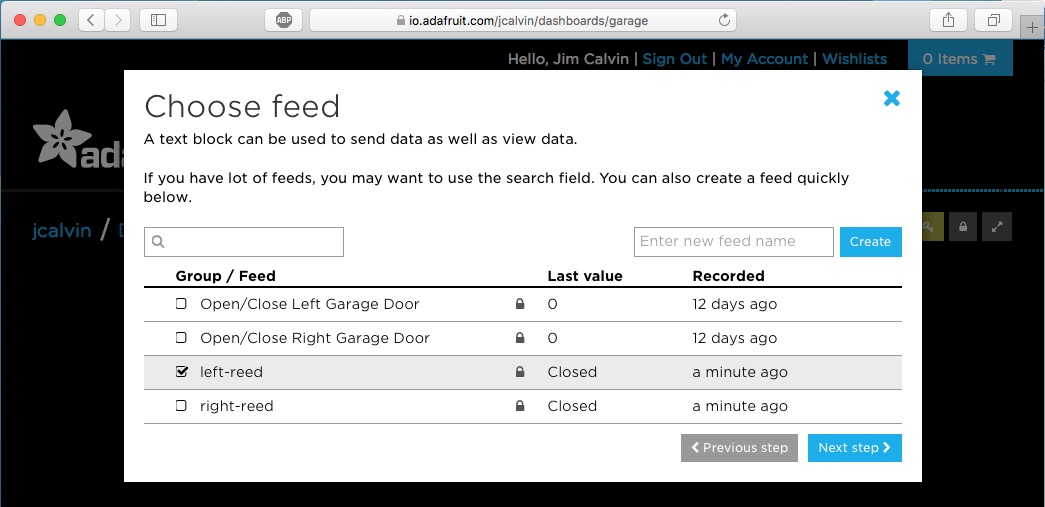
Choosing a Feed for a new Block
In this step we supply a label for the feed value that will be displayed. We can also select a text size for the feed value. I used "Left Door" here to use as a label for both the feed value (which will be "Open" or "Closed") and for the Open/Close button we'll create a little later. I ended up using the "Large" setting for the text size. Click "Create block" when done.
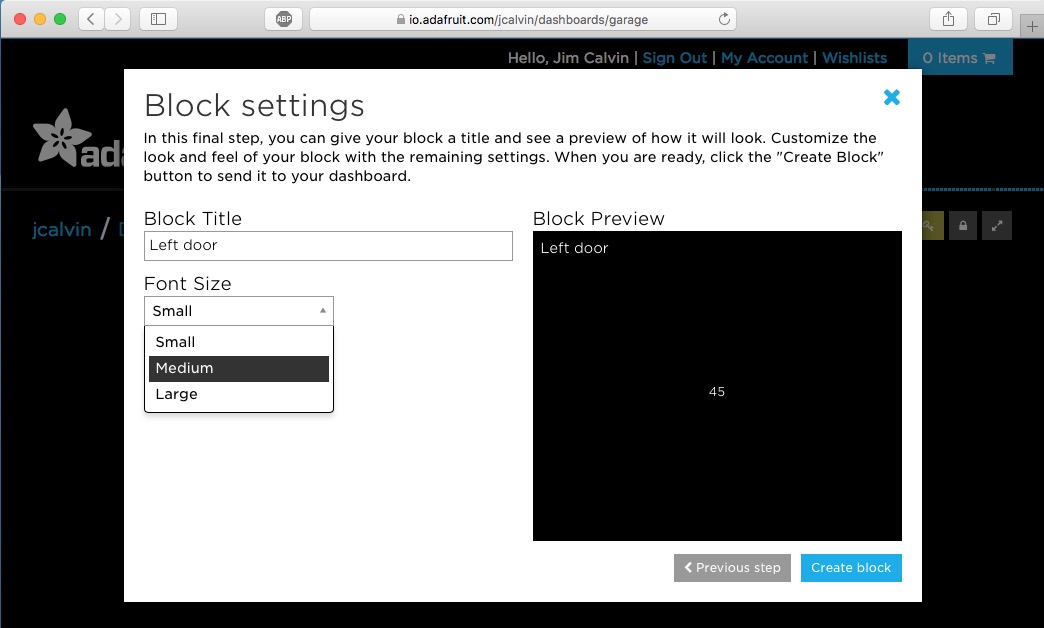
Setting the name label and text size
Now our Dashboard has a block showing the current state of our "left-reed" feed.
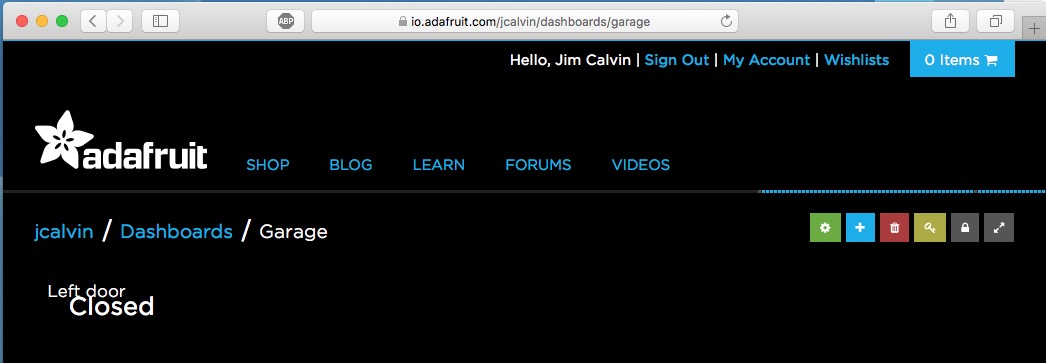
First feed in our Dashboard
Repeat this process for the "right-reed" Feed. Now we need to create Blocks for our open/close Feeds. Once again click the "+" button, but this time choose the "Momentary button" Block.
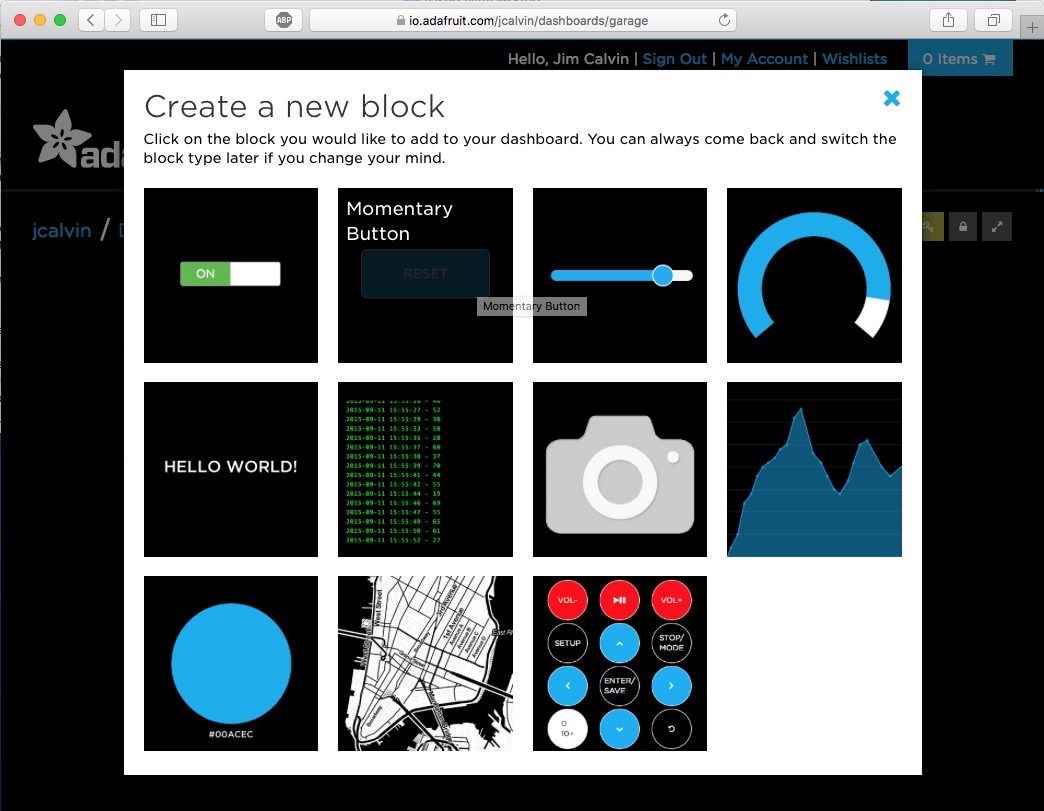
Adding a Momentary Button Block
Choose the "Open/Close Left Garage Door" Feed and click "Next Step>".
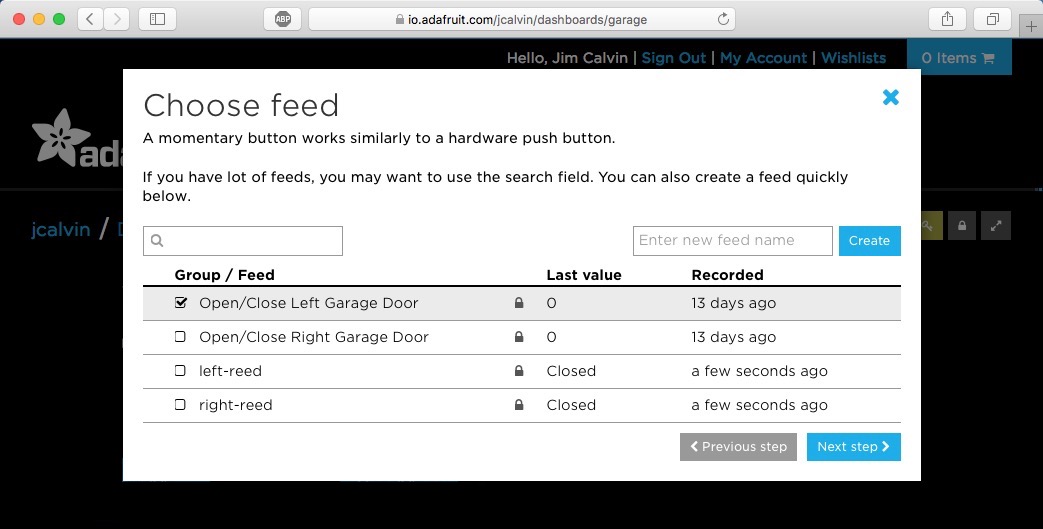
Selecting the Feed for the Block
As with the text Block, you will be prompted for the Block settings. I chose to use "Open/Close" as the button text. I set the block title to " " (a space) so that nothing would show up in my Dashboard. The reason for this will become apparent a bit later. Click "Create block" when you happy with the results. Note: The button text chosen is not tied to any code, so you can choose what you like. However, the "Press Value" and "Release Value" of 1 and 0 are tied to the code. Don't change those values.
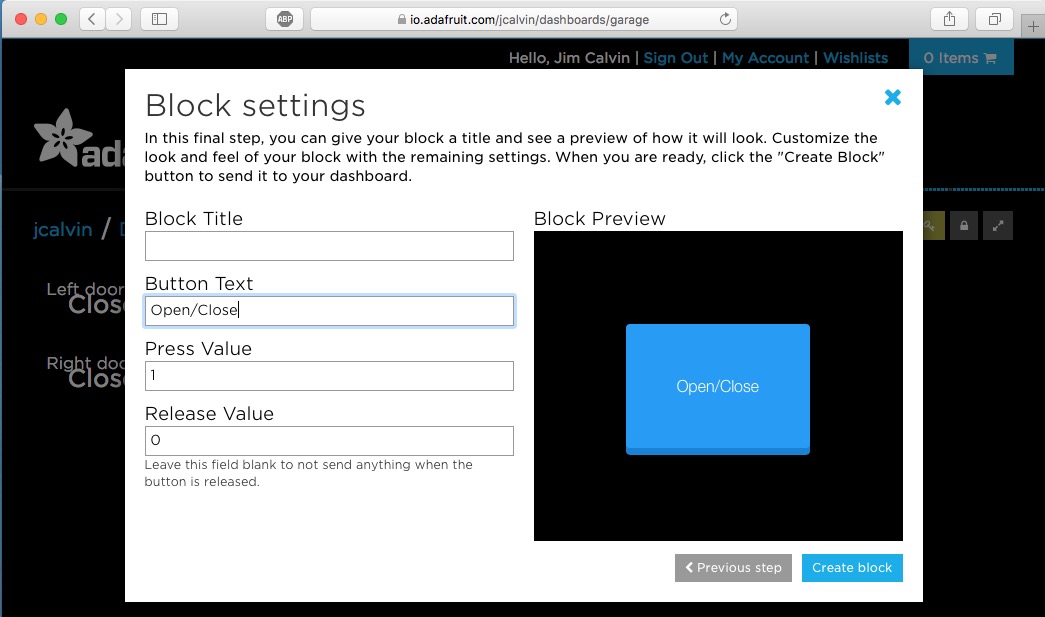
Naming the Momentary Button
Repeat this process for the Right open/close Feed and our Dashboard should look something like below.
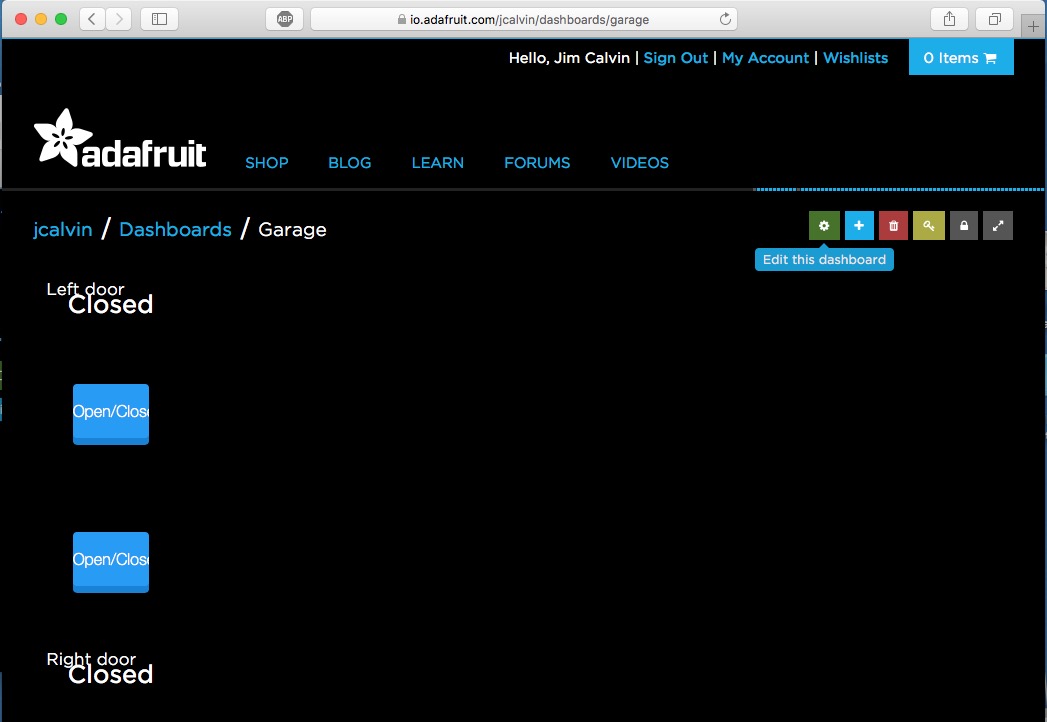
Dashboard with all Feeds added
The Dashboard will function properly at this point. But we might want it to look a little nicer. Fortunately, Adafruit provides some editing capabilities. Click on the gear sprocket icon (hovering over it reveals "Edit this dashboard"). The Dashboard will change appearance to something like this.
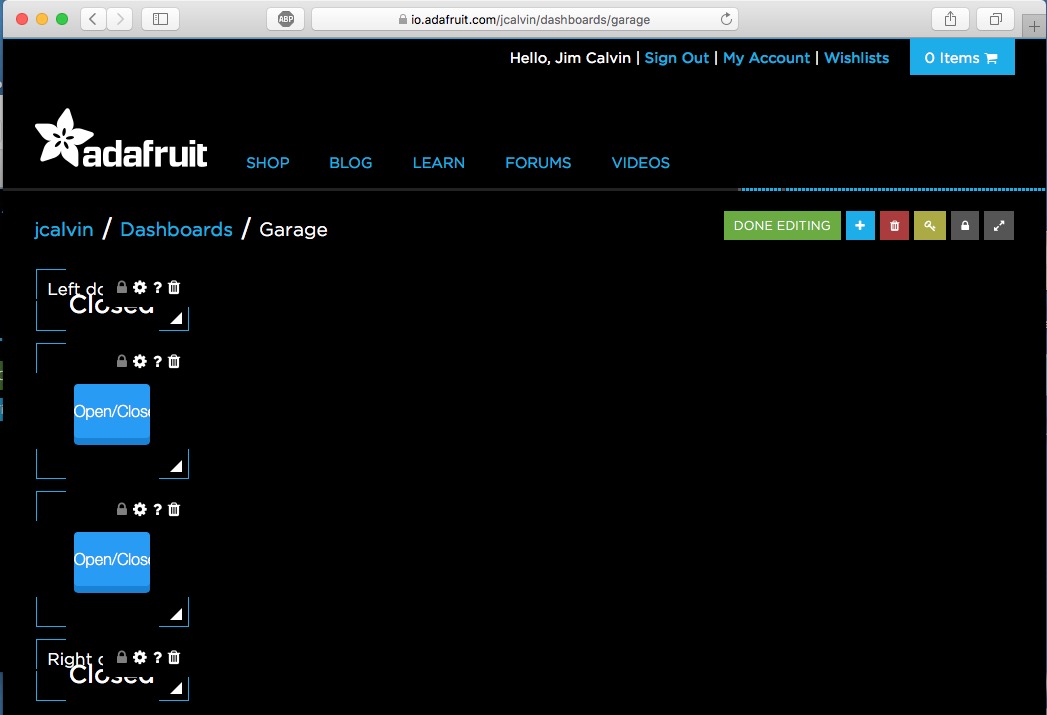
Dashboard in Edit mode
I chose to move and resize the Blocks as appears below. You may decide on a different layout.
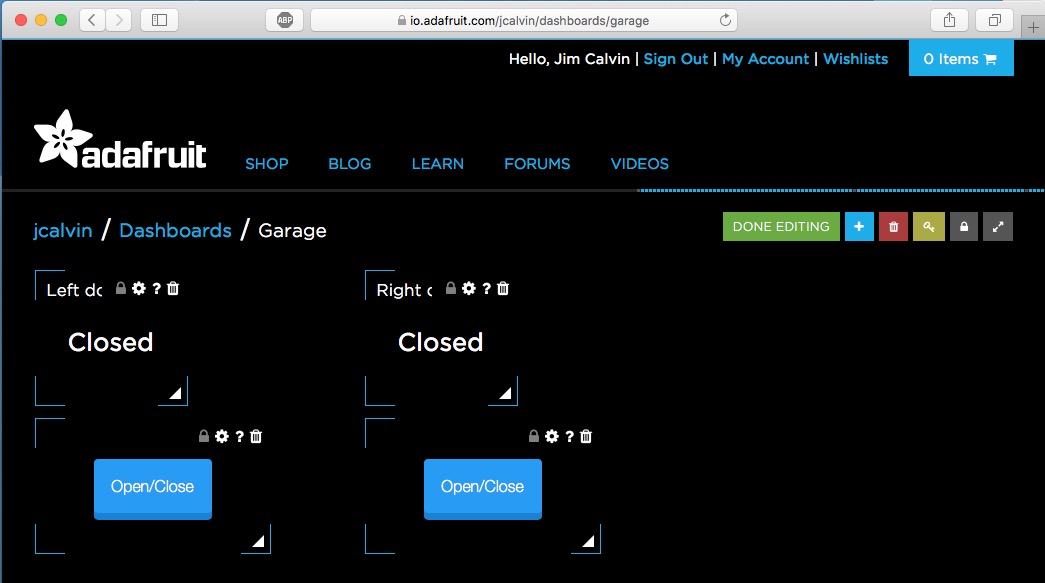
Dashboard Blocks rearranged
Click the "DONE EDITING" button and you will see the finished Dashboard.
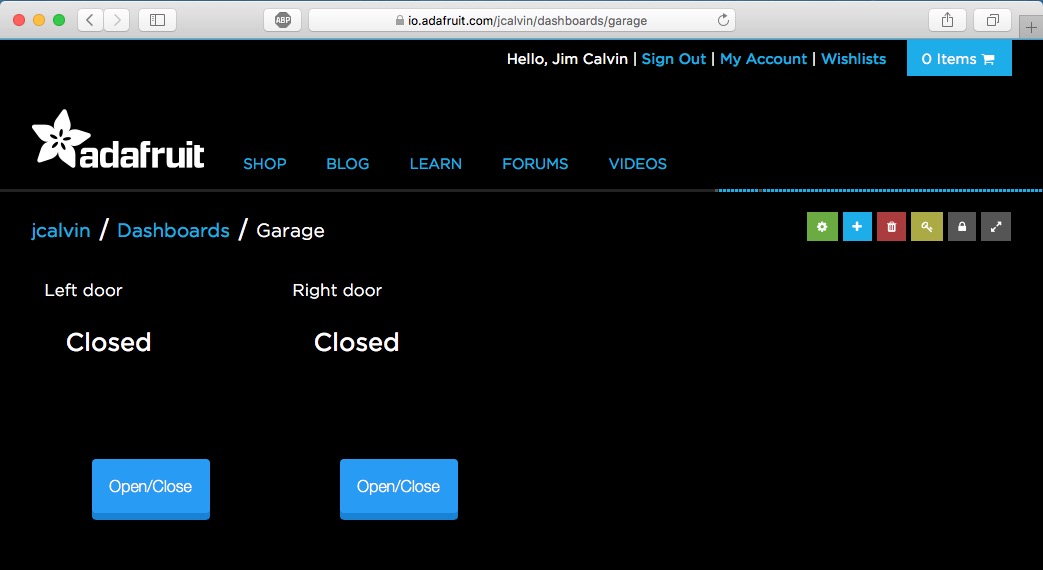
Completed Dashboard
Make a bookmark for this web page. That wil give you a quick way to get back to your Dashboard.