Hardware
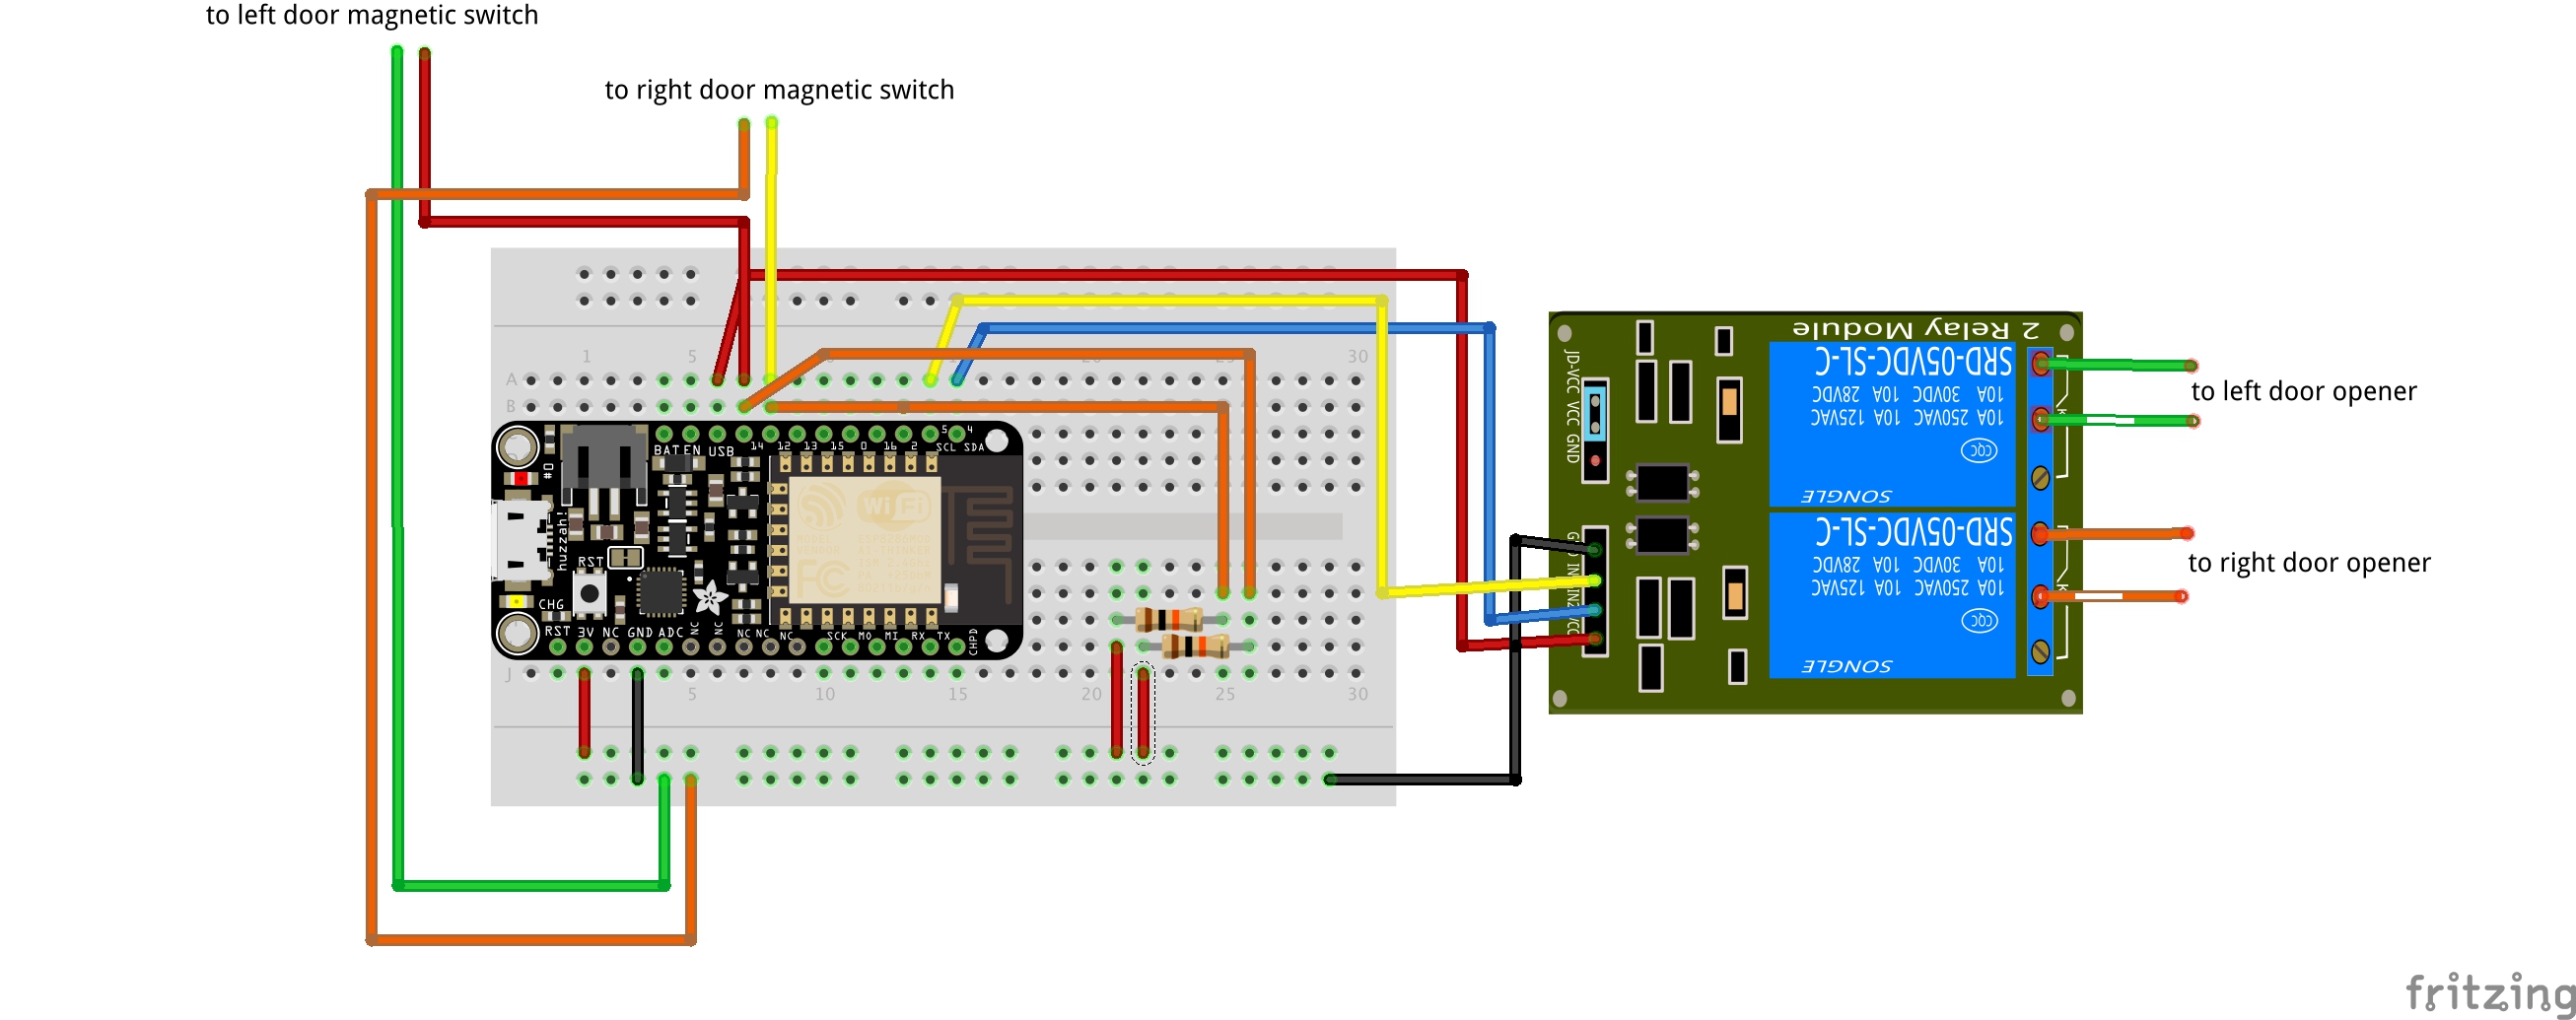
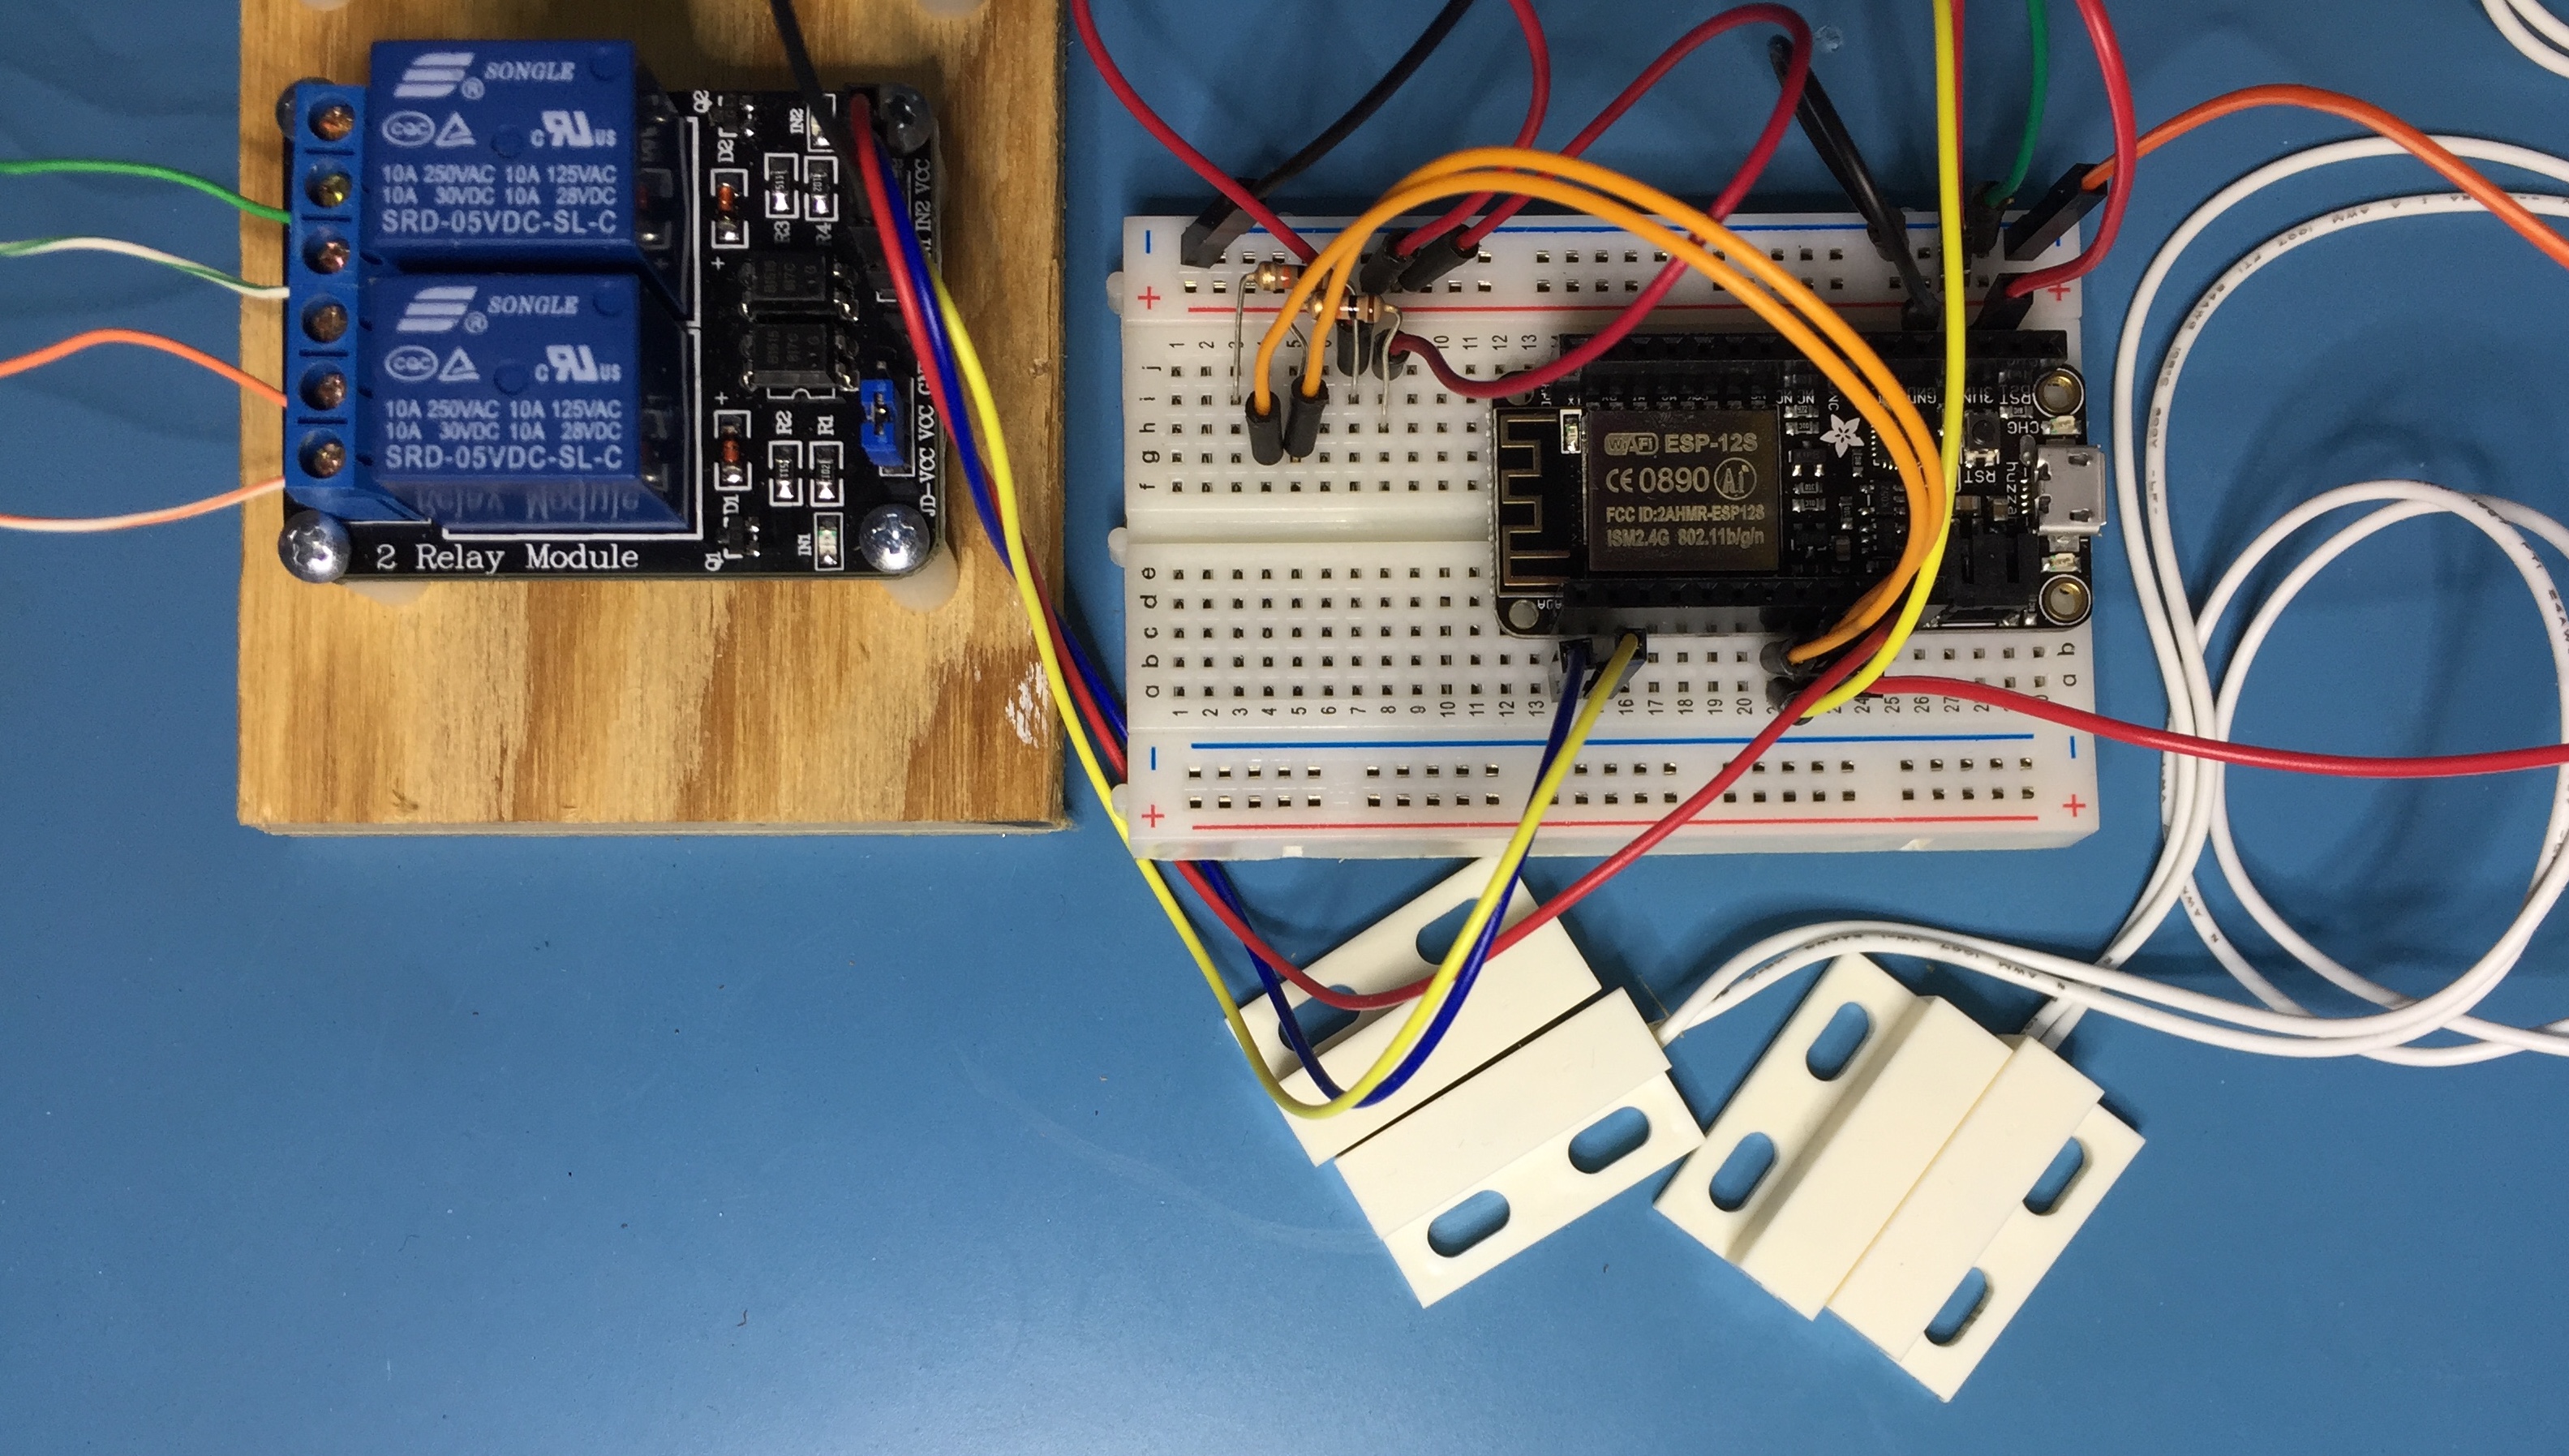
Below you'll find the fritzing digram for the project, and as-built photos.

Fritzing diagram of the project
To assemble your project, mount your HUZZAH positioned on the breadboard as seen in the fritzing diagram. Then install the various jumpers as shown in the fritzing diagram.
Use four of the female/male jumpers to connect from the breadboard to the magnetic contact switches. Insert the bare end of a switch wire into the female portion of the jumper. Once installed, tape it so that it doesn't come apart. This would be much better if spliced and soldered, but we're taking a no solder approach right now.
You should end up with something that looks a bit like this:

The project as built
You'll notice that we're getting +5volts from the USB power to drive the relay module. While the HUZZAH can run off an external lithium ion battery, this project won't fully work running off the battery since it can't power the relay. But that probably doesn't matter -- if the power is out for your USB supply, your garage door opener likely doesn't have power either (although apparently some newer models have battery backup). Your WiFi may be down as well.
My plan was to install the HUZZAH board centered between my two garage doors. I was lucky in that the length of the wires on the magnetic contact switches plus a length of the patch wires I was using would reach to the garage doors. If yours don't reach, use multiple female/male jumpers in series until your wires reach. Remember to tape each joint.
The breadboard from Adafruit has an adhesive back. This can be used to mount the breadboard to a piece of wood, along with the relay module.