Hardware - soldered
Below you'll find the fritzing digram for the project, and an as-built photo. However, at the time I was building this project, the Adafruit Featherwing proto board was out of stock. So my as-built looks a bit different (not as neatly done).
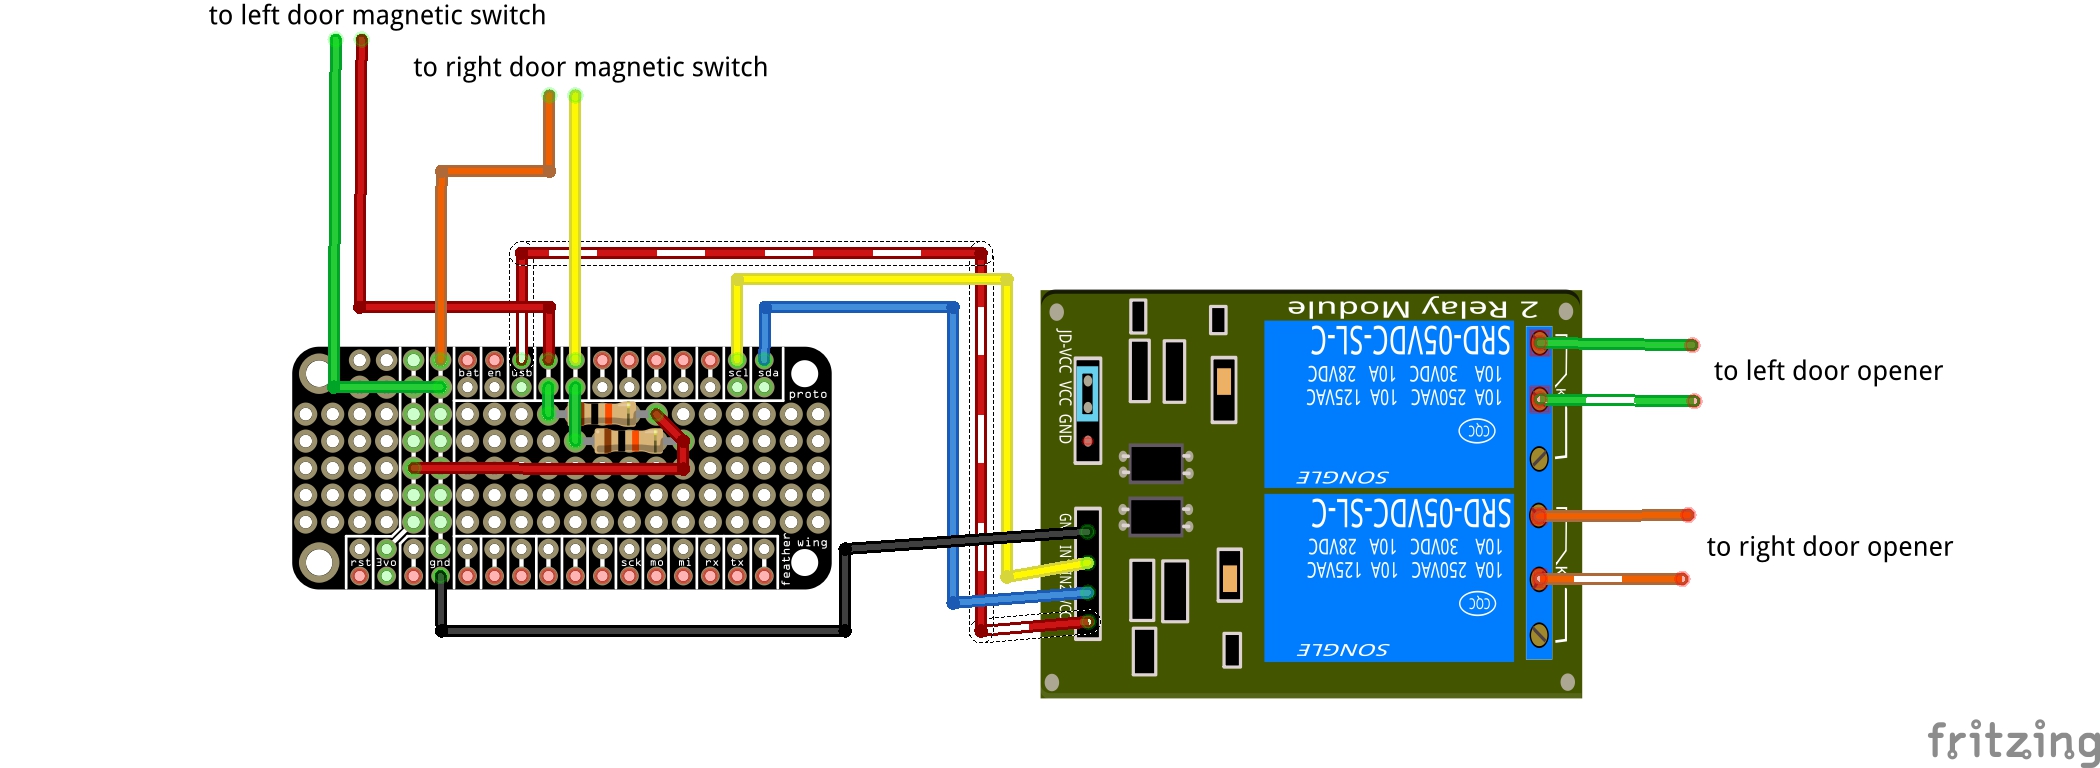
Fritzing diagram of the project
I wanted to make it easy to remove the HUZZAH assembly from the installation at a later time. That way I could remove the HUZZAH to work on it at a desk rather than in the garage. So I stuck with using jumpers on header pins to make this easy to do.
If I had used the Featherwing protoboard, I would have installed extra long headers on the protoboard. This would have facilitated a much easier build. The protoboard would simply stack onto the HUZZAH Feather. Then the jumpers could be connected to the long headers on the stacked protoboard. Soldering would be limited to installing the pull-up resistors and headers on the Feather protoboard.
Because I used a protoboard I had lying around, I had to improvise a bit. First I didn't want the HUZZAH resting directly on the protoboard. I was a little paranoid that something might short out. So I used headers in an unconventional way to raise the HUZZAH off the protoboard. This of course meant that the headers extending from the HUZZAH were a little short to use with the jumpers — might have worked — might have been intermittent. Since I had plenty of space on the protoboard, I installed headers on it so that the jumpers could make a solid connnection.
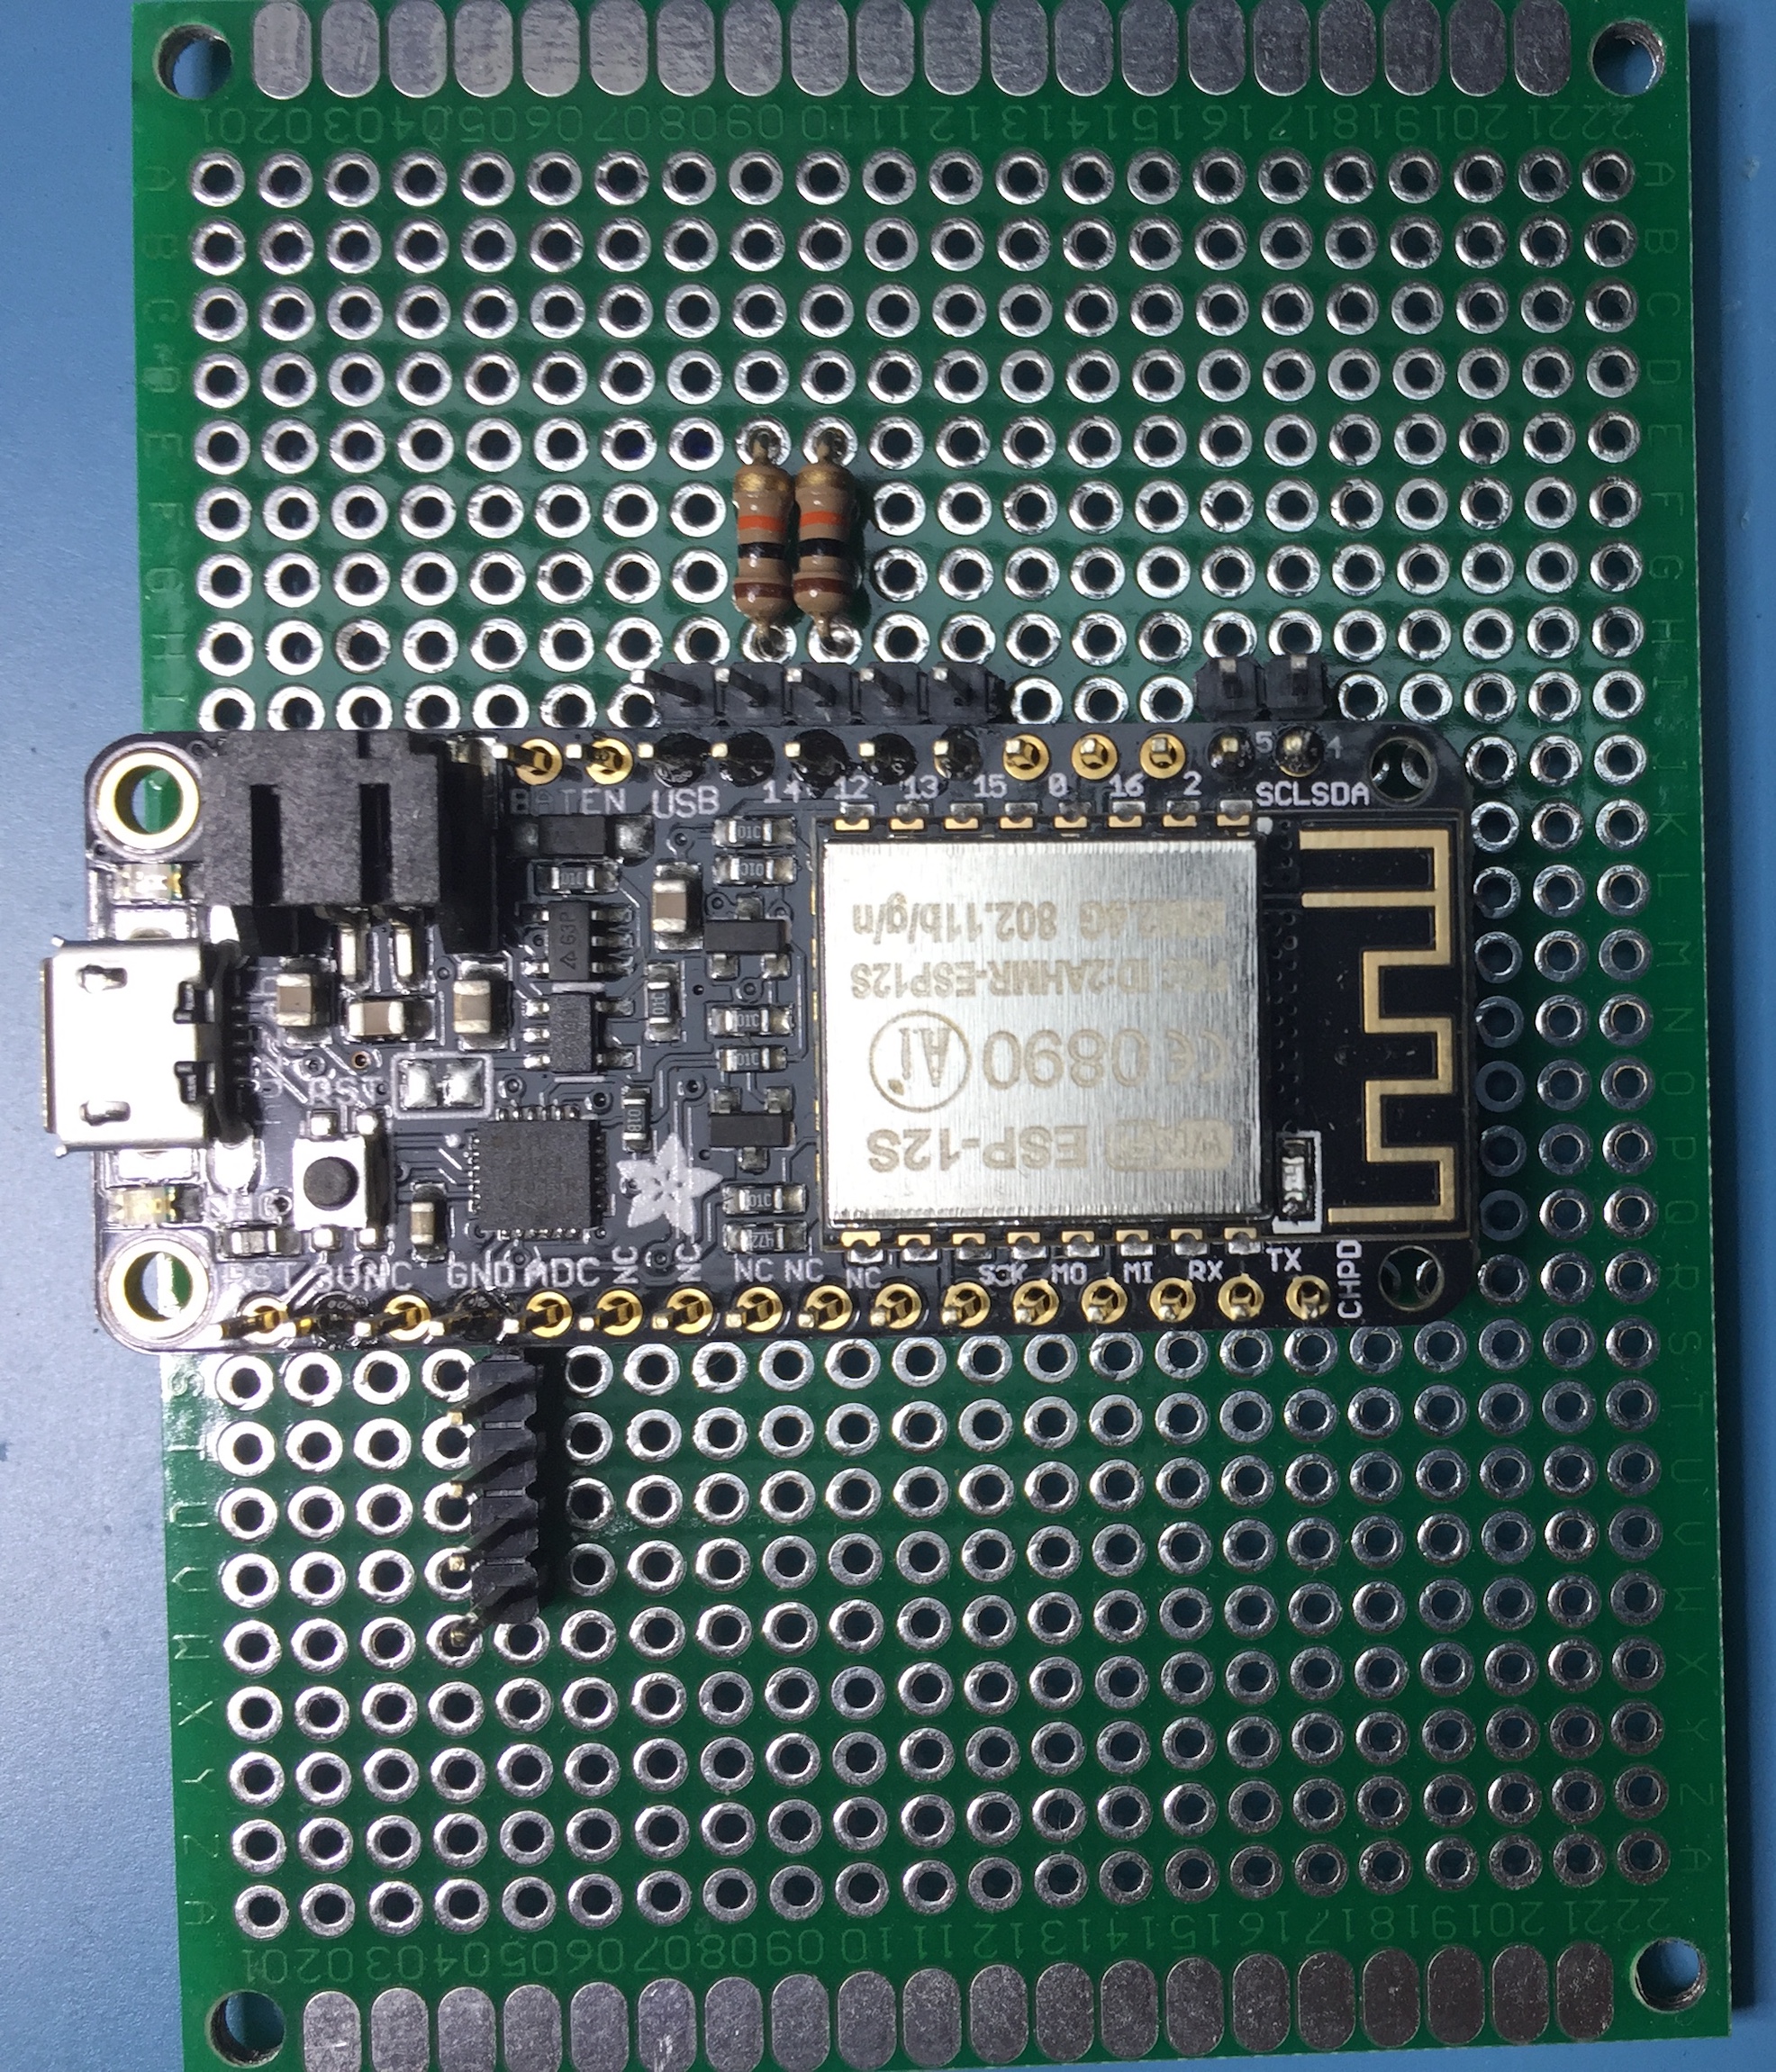
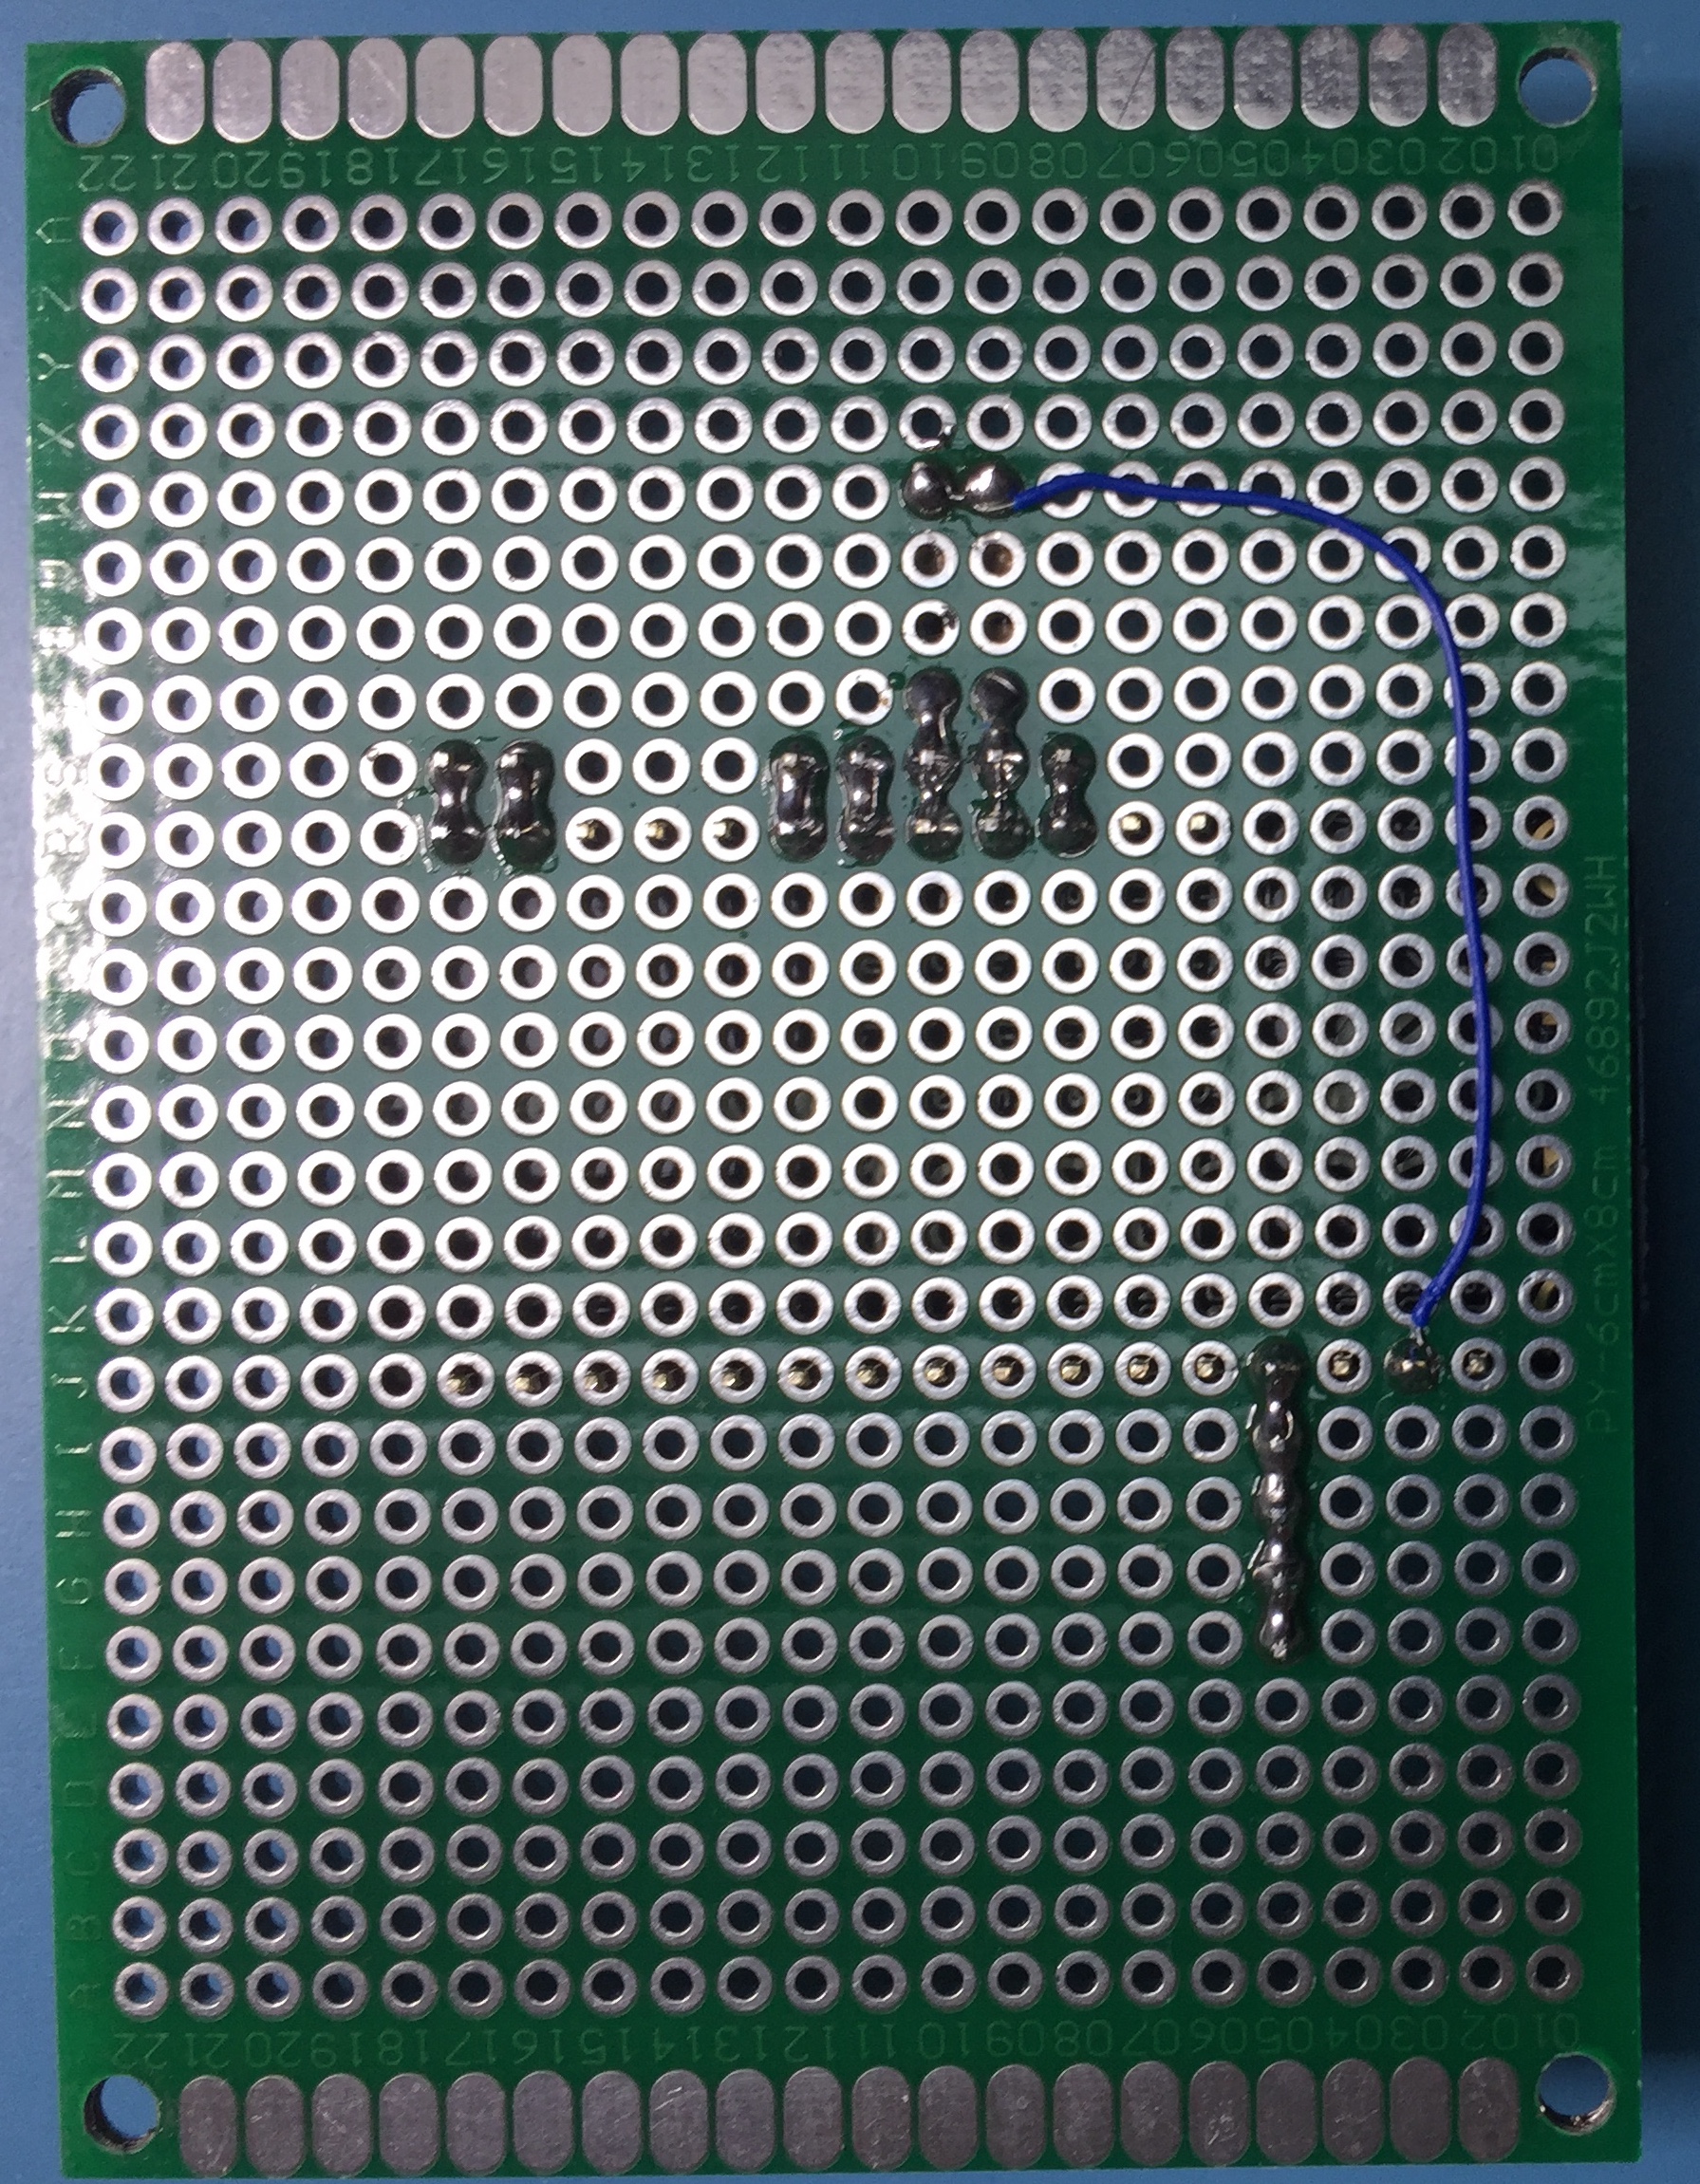
Component and solder sides as built
If you look closely at the photos above, you'll see that I only soldered the header pins that I was using in this project. I did this on both the HUZZAH board and the protoboard. My reasoning was that if I ever wanted to take this thing apart, it would make de-soldering a little easier.
You'll note a row of jumpers next to the ground pin of the HUZZAH. These are to connect ground to the relay module and the magnetic contact switches. The blue wire seen on the solder side is the +3.3v running to the pull-up resistors. Everything else is simply connecting my external header pins.
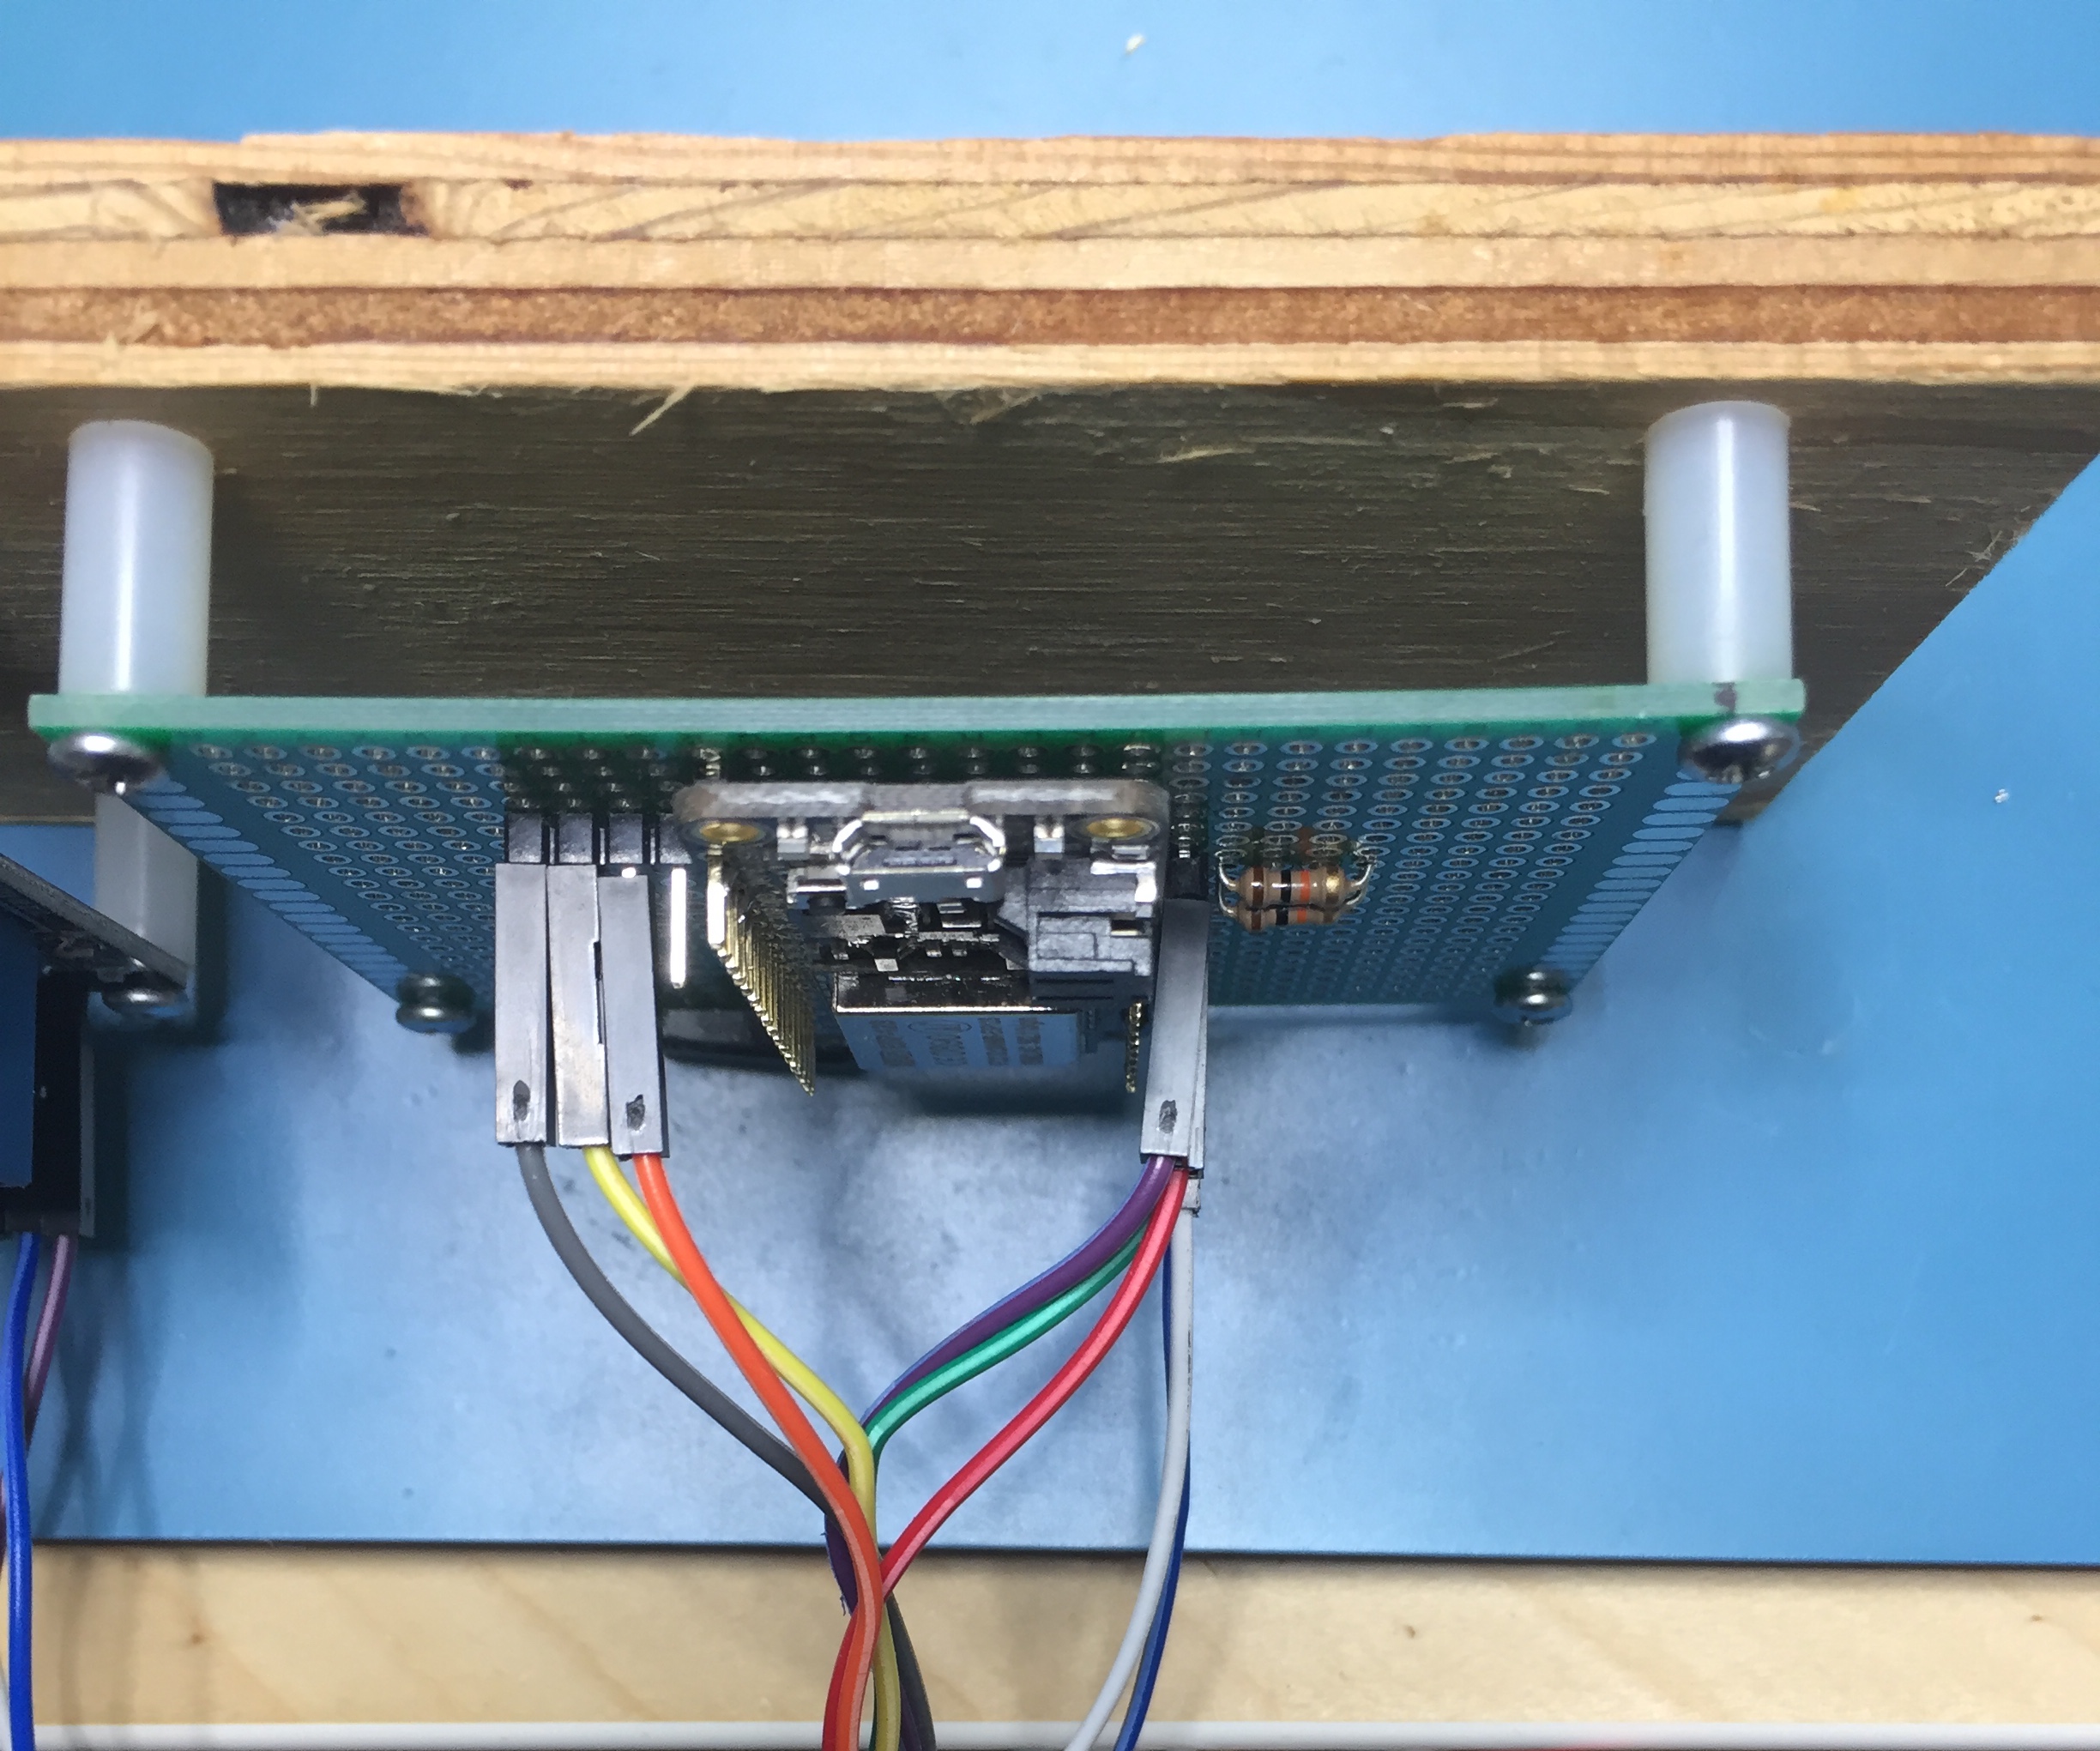
Using headers for interconnections
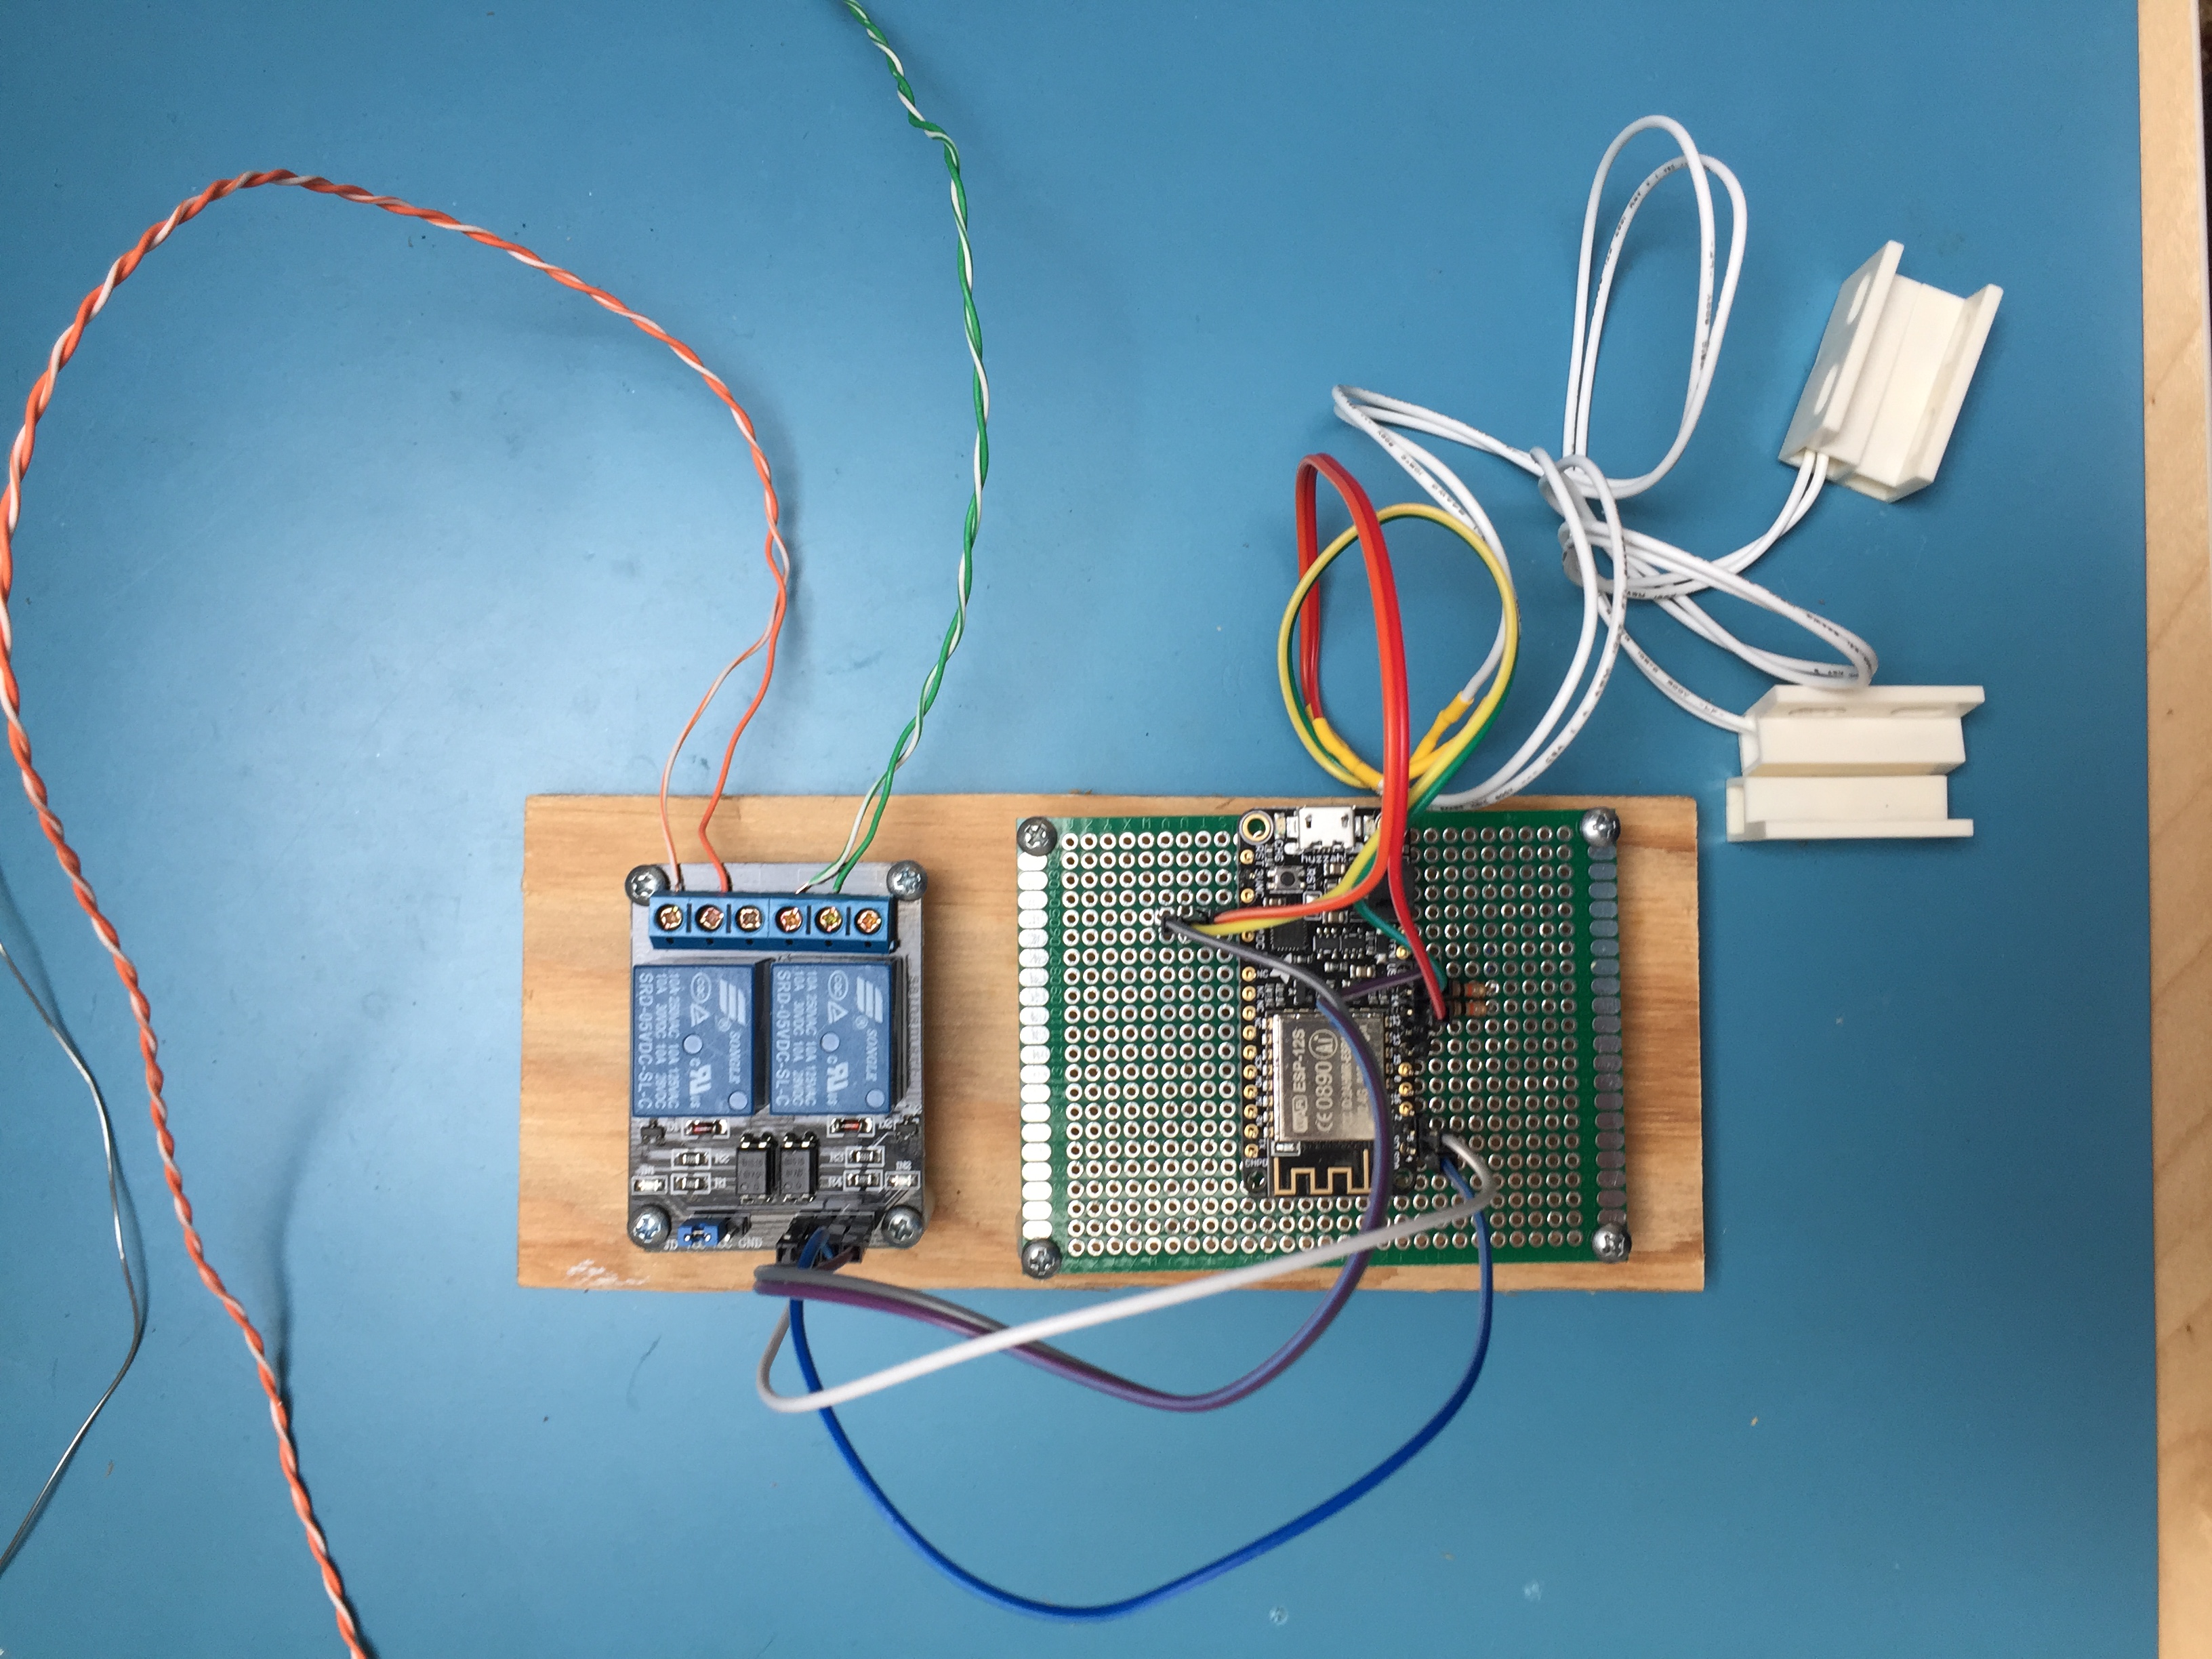
The project as built
My plan was to install the HUZZAH board centered between my two garage doors. I was lucky in that the length of the wires on the magnetic contact switches plus one length of the patch wires I was using would reach to the garage doors.