Freestyle Help
Contents
- The Freestyle Tab
- Using fingers (or a mouse) to create polygons
- Managing polygon layouts
- Tutorial
- Shortcuts
- Support
The Freestyle Tab
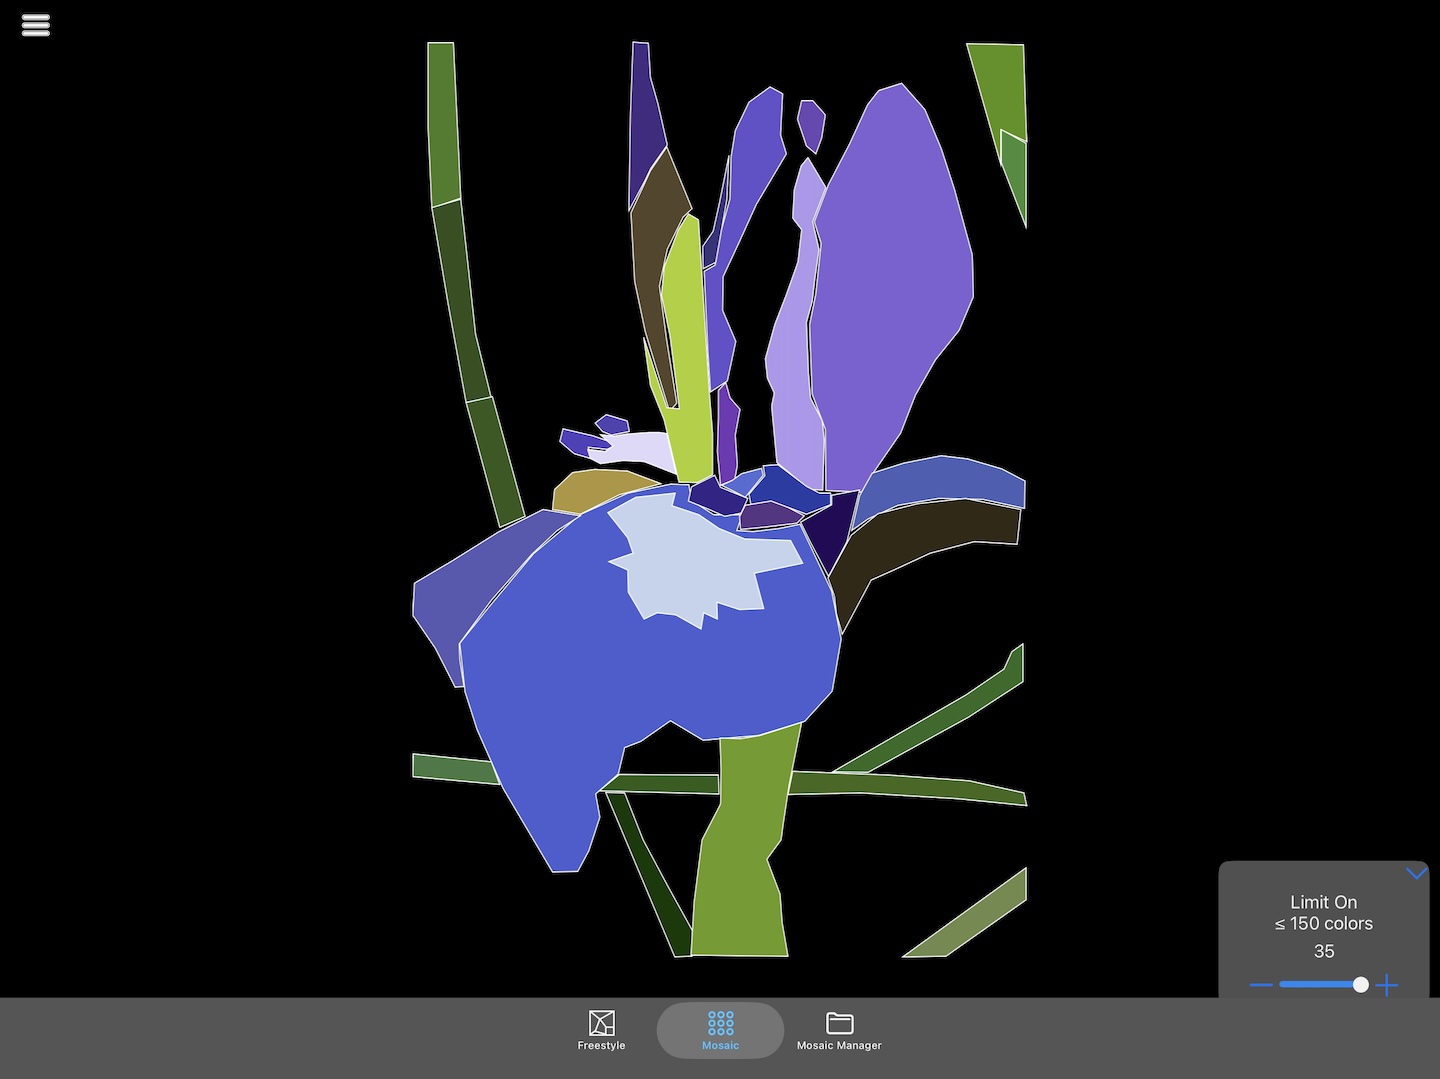
Here is the basic Freestyle tab
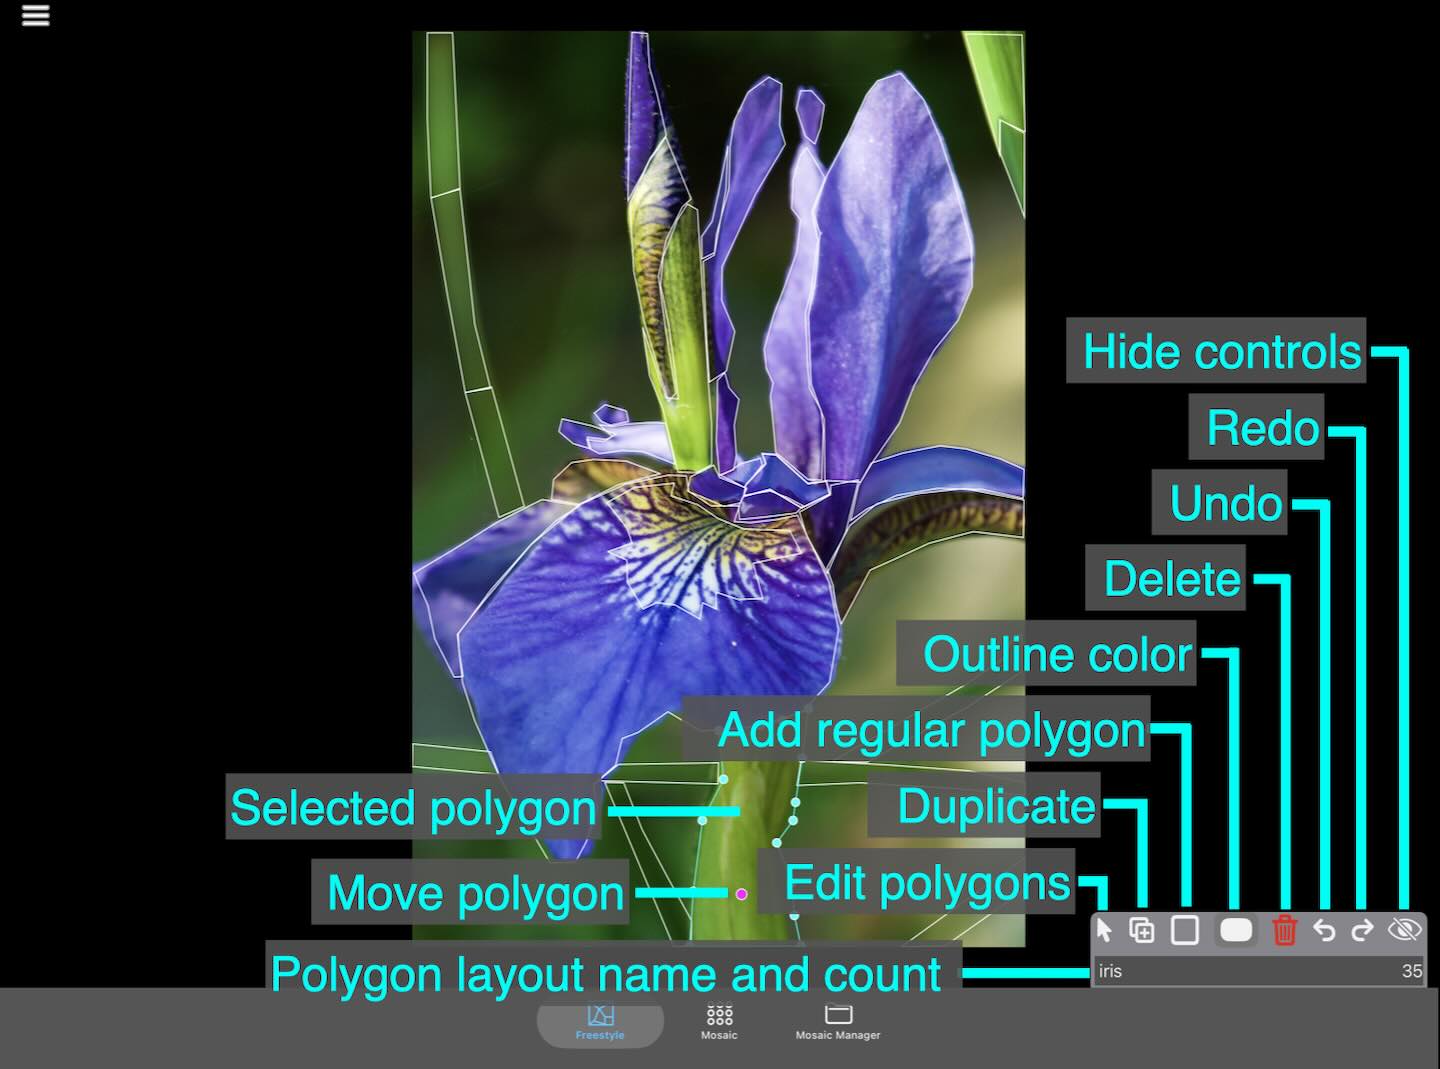
Freestyle works best on an iPad using an Apple pencil or other stylus, or on a Mac using a mouse. It is possible to use your fingers on an iPhone or iPad, or with a mouse on an iPad. Instructions for this appear below.
Using your pencil, touch the pencil to the screen and start moving the pencil. When you want to create a point on your polygon, push a little more firmly and the relax that press. The green rubber band line will turn yellow indicating that a new point was created. Keep doing this until your polygon outlines the desired area. Lifting your pencil will close the polygon back to where you first touched down the pencil. The new polygon outline will be selected showing the all of the points created to form the polygon.
Note that polygons
Using fingers (or a mouse) to create polygons
To add a polygon,touch the screen with one finger and start dragging. When you want to create a new point in the polygon, lift your finger from the screen and then touch the screen and continue dragging. Repeat this process to create your polygon. A double tap will close and complete the polygon.
When using stylus without force capabilities, the technique is the same as using your finger: touch down, drag, lift up, touch down, drag, etc. Double tap to finish.
With the mouse, press the left button and begin moving the mouse. Release the button, press again and continue dragging. Repeat the process until your polygon is formed, ending with a double click to close the polygon.
Another approach is to use a long press on the □ icon. When the long press is released, a popup of shapes  appears. Tap one of the shapes and a polygon will be added. The polygon can be moved and points can added added or deleted to create a polygon outlining the desired area. Use a pinch gesture to resize the polygon. Use a rotate gesture to rotate the polygon.
Managing polygon layouts
Freestyle supports creating multiple polygon layouts. To manage these layouts, tap the name of the current layout.
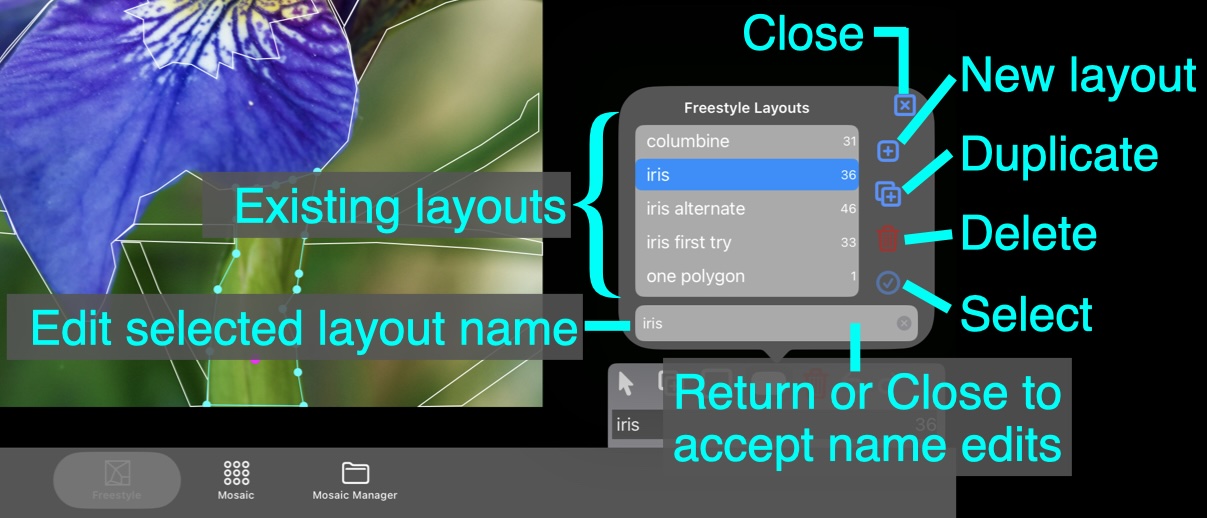
The layout manager also remembers the photograph and crop information that was used when the layout was lasted edited. When switching between layouts, the photo last used when editing the polygon layout will appear with the polygons.
For addtional help, please see ColorHints Mosaic Help
Tutorial
A tutorial titled Using Freestyle in ColorHints Mosaic is available
Shortcuts
- Tap
- A tap will select, or deselect a polygon. A tap on a vertex of a selected polygon will select that vertex.
- Long press
- A long press on □ pops up a set of regular polygons that can be added
Long press on the polygon outline color offers to change the outline color of ALL polygons
- Pinch gesture
- When a polygon is selected, a pinch gesture can be used to resize the polygon
- Rotate gesture
- Rotates the selected polygon about the move point (the magenta dot)
- Delete key
- With a keyboard attached, the delete key will delete the selected polygon. Delete also aborts creating a polygon.
- ⌘-D
- With a keyboard attached, ⌘-D duplicates the selected polygon
- ⌘-Z
- With a keyboard attached, ⌘-Z invokes UNDO
- ⇧⌘-Z
- With a keyboard attached, ⇧⌘-Z invokes REDO
- Arrow keys
- Moves the selected polygon 1 pixel in the direction of the arrow. If a shift key is down when the arrow key is tapped, then move 10 pixels in the direction of the arrow.
Note: the arrow keys can be captured by iPadOS. You can get around this in one of two ways, 1) hold down the control key when tapping an arrow key, 2) turn off Full Keyboard Access in Settings>Accessibility>Keyboards & Typing>Full Keyboard Access
If a vertex is selected, arrow keys move the vertex rather than the whole polygon.
Support
Send EMail to Swaystairs support